This tutorial will show you how to make time lapse video on KINGROON KP3S Pro V2 with the DSLR. If you prefer to use a webcam, the tutorial will be available later.
Part 1 Prepare
In this part, you need to prepare required things, use the proper settings and tune your printer well.
1.1 Things you need

For KINGROON KP3S Pro V2, you will need a shutter, a trigger, a limit switch, and a fake battery. The Fake battery and shutter should fit your DSLR.
Shutter
Actually, you need the shutter cable only.
Trigger
The trigger you can find it here: https://cults3d.com/en/3d-model/various/this-is-the-adapter-i-used-to-make-timelapses-on-my-kp3s-v2
Thanks to LIRAROCK.
You need to use it to install the limit switch. I recommend printing it in 100% infill to make sure it’s durable enough.
The limit switches
Here we use the limit switch of the KINGROON KP3S. You can use others instead.
Fake battery
The time lapse videos require take thousands of photos, a normal battery won’t survivor in such photo taking, a fake battery will help the camera get continuous power supply.
1.2 Slicer settings
Since time lapse requires to move the extruder away for taking photos, it is easy to get you extra stringing than normal printing, so it is important to use a good slicer setting.
You can find our slicer settings here: OrcaSlicer Using on Your KINGROON KP3S Pro V2 and KLP1
It is highly recommended, updating and much better than our default Cura settings.
1.3 Tune the printer well
After that, tuning your printer well is another thing you need to prepare. You can find it here: Collapsing Swords, a small challenge to your KP3S Pro v2 and KLP1
Part 2 Set up the trigger
2.1 Now you can start to make the cable.
Install the switch on the trigger. Then remove its port.
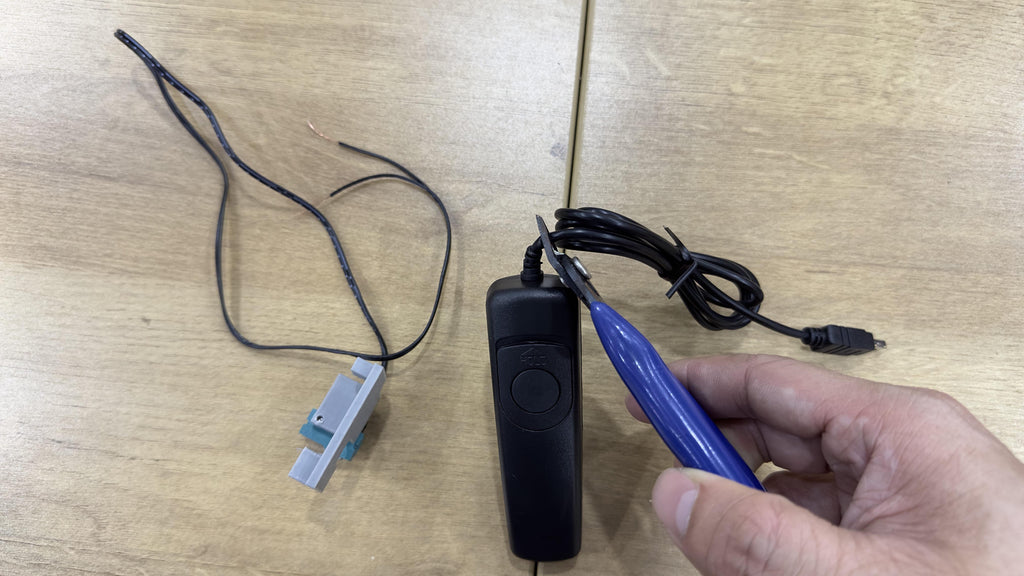
Then cut the shutter and keep the shutter cable. Connect the cable to the DSLR camera, then connect the other side to the limit switch, change the connection combine and press the switch to find out the correct connection that will trigger the camera.

Once you find it, you can weld, wrap, or use other ways to fix it. Here we use some electric tape.
Part 3 Set up the Slicer
3.1 Find out the proper distance
After that, you need to find out the proper distance to trigger it. Install the trigger on the end of the X-axis.
Then go to the Klipper dashboard, home all axis, then move the extruder on X-axis. You can go with 190 first then change the distance to 1mm.

Once the trigger is triggered, you find your settings. So, mine is 194.

Remember this value, you will need it soon.
3.2 Modify the Slicer settings
Then we come to modify the Slicer settings to make the trigger works automatically so that the camera will take a photo after every layer change.
For OrcaSlicer Users, all you need to do is copy and pasting the following code.
;TimeLapse Begin
G1 F9000 X194 Y150 ;Park print head
M400 ;Wait for moves to finish
;Snap Photo
G4 P350 ;Wait for camera
G0 X99.992 Y130.427; Restore position

Click on the edit button, then paste the code to “Before Layer Change G-code” field. Then you can slice it to print.
For Cura users, go “Extensions”, select “Modiy G-code”, select “Post Processing Scripts”, then do the settings as the photo shows.

If you got a different value than 194, just modify the “Dark Drint Head X” value in Cura or modify “G1 F9000 X194 Y150 ;Park print head” in OrcaSlicer.
3.3 Slice and do a print
After that, you go ahead for your first printing in time lapse mode. Slice as normal prints, then copy it to the USB drive to print. If you are using the OrcaSlicer and have it connected with the printer, you can print it directly online.

Click “Print”, click “Upload and Print”, then your printer will start printing when it is ready.
Part 4 Prepare for photo taking
4.1 Adjust the camera
When the print start, check the extruder parking status, make sure it triggers the camera. If not, adjust the previous settings and slice the file again. If yes, turn off the printer immediately when it is triggered.

So, you now get the accurate position, you can mark on the printer so that you find it easily later. Then put a same print object to the same position it prints.
After that, adjust the camera to make the photo looks good, then switch to manual mode use manual focus to find the best focus distance.
You should take a few photos to check the result, make sure it is focused on normal exposure and looks good.
Part 5 Print and shot
5.1 Start print
Once the adjustment finished, you can start your print. As long as the current setup remain the same, you don’t need to adjust it any more.

All you need to do is waiting. After the printing finished, collecting all the photos, use software like Final Cut Pro or PR to covert them into a video, then you get you time lapse.