 United States (USD $)
 Российская (RUB ₽)
 Global (USD $)
Once you print with Klipper firmware or use Klipper models like KINGROON KP3S Pro V2 or KLP1, it is time to print via Slicer, no matter you are using UltiMaker Cura, PrusaSlicer or Orca Slicer. It will save you a lot of time and make 3D printing become much more convenient. This tutorial will show you how to set up your printer in the above three slicing softwares.
Part 1 Prepare
Before start, you need to connect the printer to the internet, enter Klipper dashboard with the IP address and add the printer profiles to the slicing software.
Knowing Basic Klipper firmware use, Check:
How to Prepare Klipper Firmware for Kingroon KP3S Using Fluiddpi
Internet connection on KP3S Pro V2 and KLP1, check:
Internet Connection and Wi-Fi Configuration on the KP3S Pro V2 and KLP1 3D Printers
Adding KP3S Pro V2 and KLP1 into UltiMaker Cura, Check:
KINGROON KP3S Pro V2 and KLP1 3D Printer Cura Profile Setting
Adding KP3S Pro V2 and KLP1 into Orca Slicer (PrusaSlicer), Check:
OrcaSlicer Using on Your KINGROON KP3S Pro V2 and KLP1
Part 2 UltiMaker Cura
For KP3S Pro V2 and KLP1 users, it is better to switch to other slicers like Orca Slier or PrusaSlicer to get best or better printing performance. Orca Slicer is the first option for our Klipper models.
If you like to stick with it, please follow the below steps to proceed.
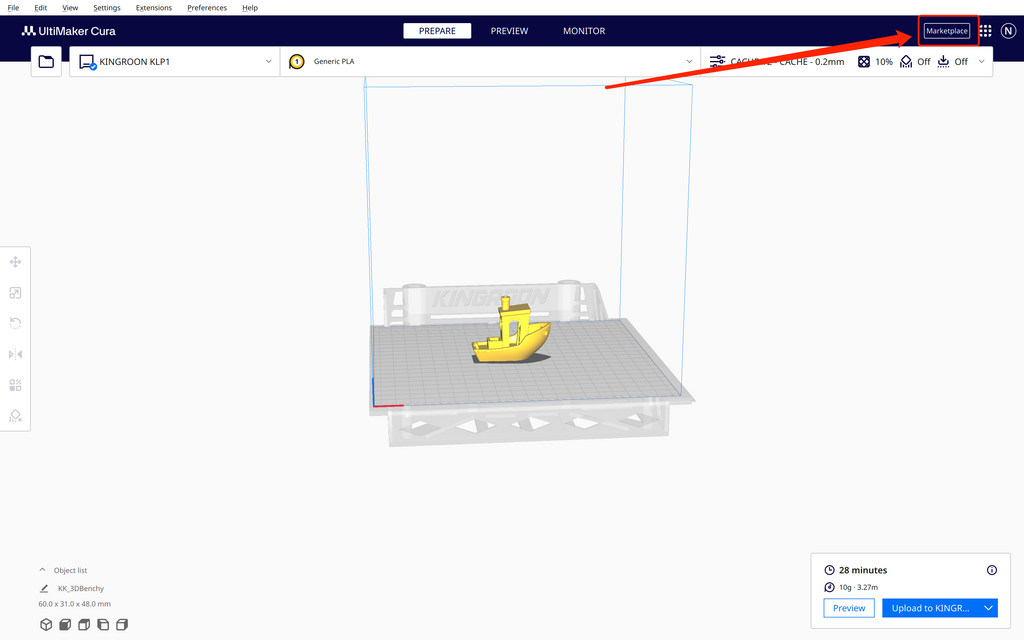
2.1 Step 1 Install Cura Plugins
Click the “Marketplace” button to open the plugin store. To print via Cua, you need to install plugins.
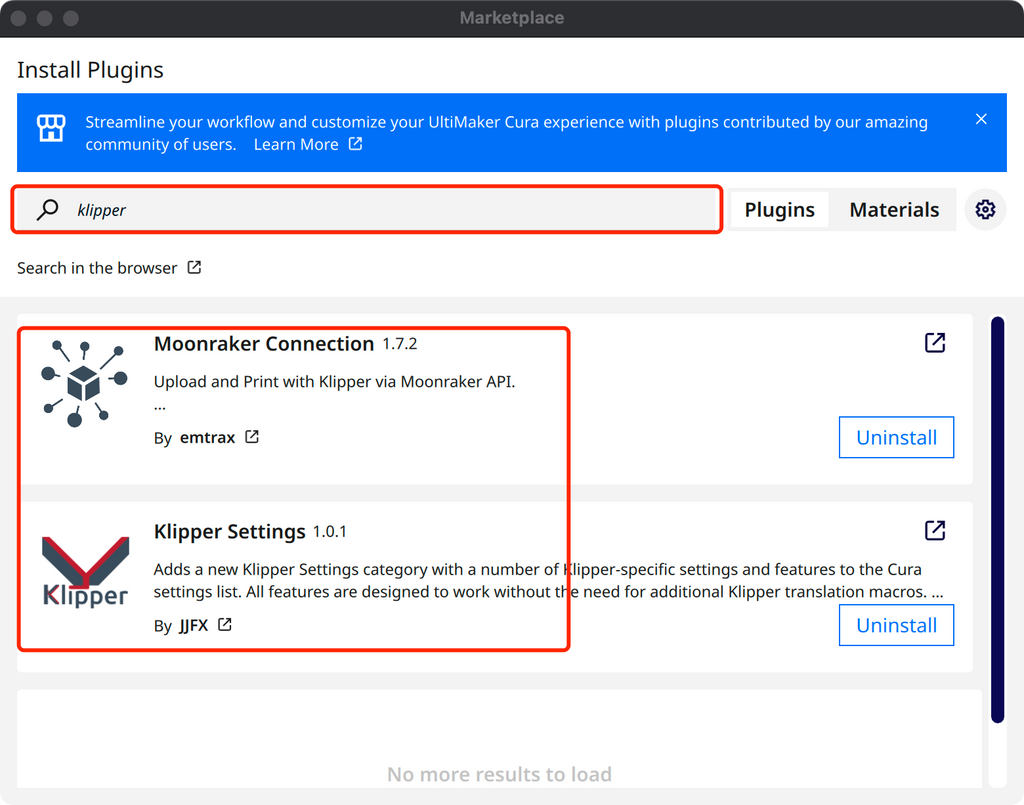
After that, search for “Klipper”. Then install “Moonraker Connection” and “Klipper Settings”. Reboot the software, your new plugins will start to work. (Here we have them already installed.)
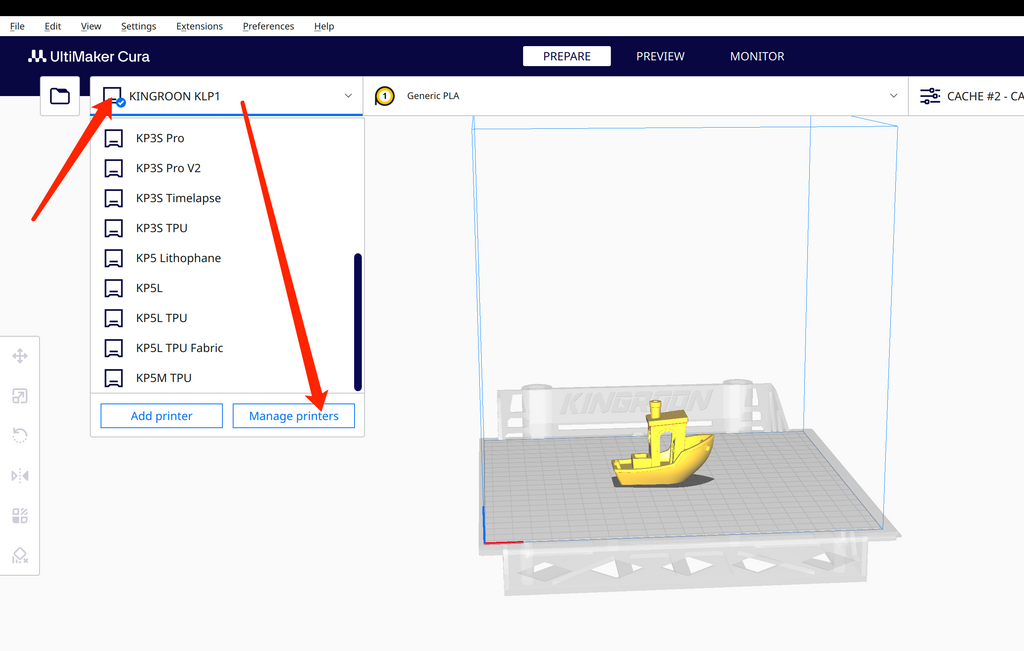
2.2 Step 2 Add IP Address and Webcam
Click to the printer list, then click to “Manage printers”, if the plugins were installed correctly, you should be able to see a new setting called “Connect Moonraker”.
After that, click to “Connect Moonraker”, then enter the printer’s IP address in the “Address” field. Then switch to the “Monitor” field, enter the URL of the webcam. Enter the IP address with the one you use to enter Klipper dashboard, with the format of “http://YOUROWNIP/”. Then the webcam URL would be “http://YOUROWNIP/webcam/?action=stream”.
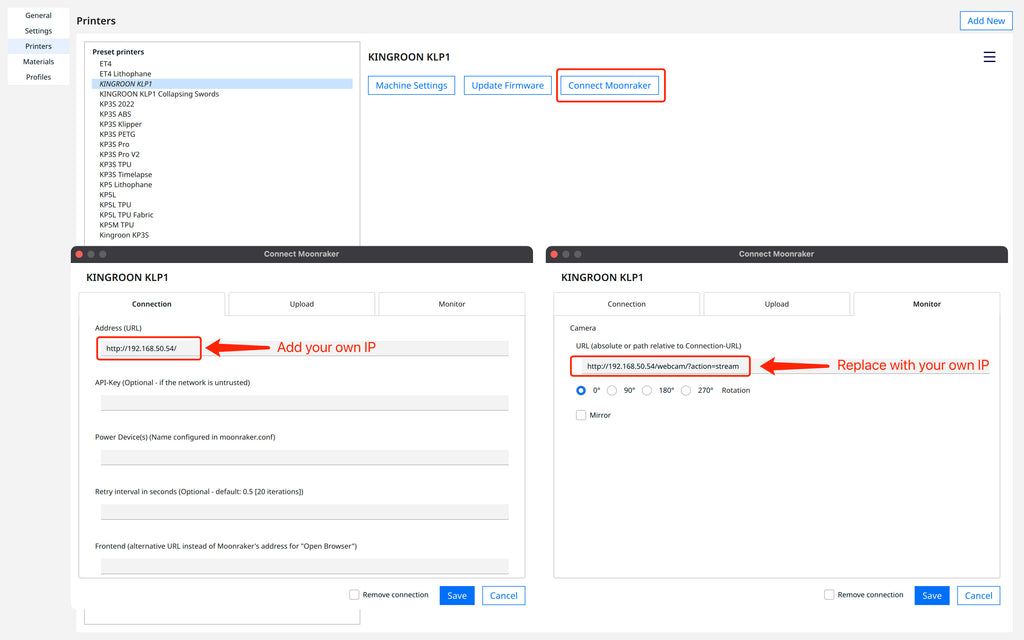
If you don’t use a webcam, skip the second settings or get a drive-free USB webcam.
2.3 Step 3 Print via Cura and Monitor via Webcam
After that, you are all set. Drag something into the slicer, slice it. Then click to the right button “Upload to KINGROON KLP1”, then enable “Start print job”, then click to “upload”, your printing is ready to go.
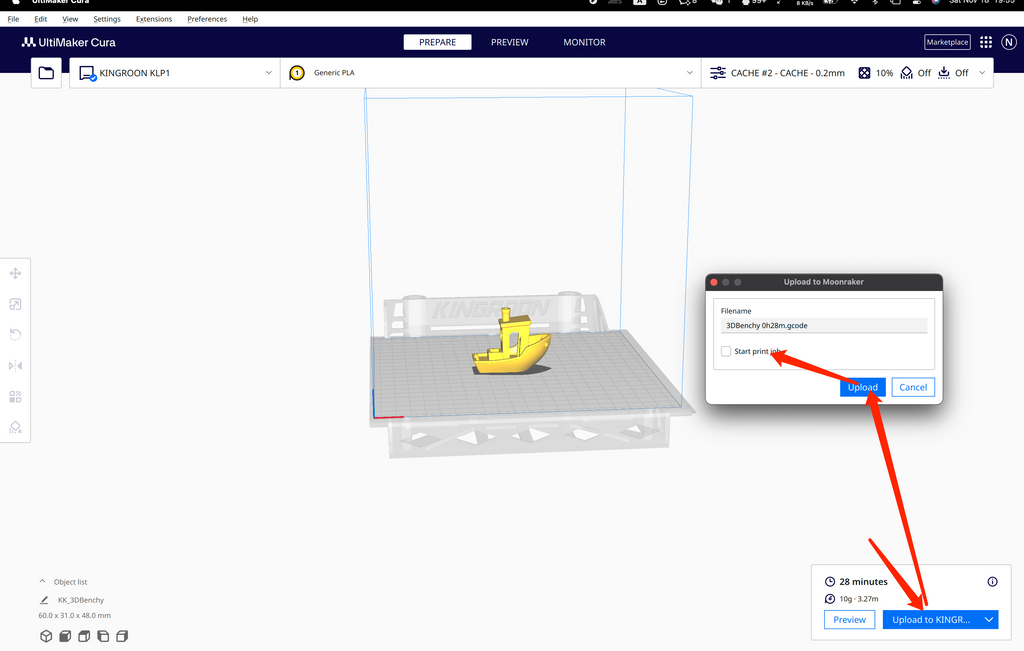
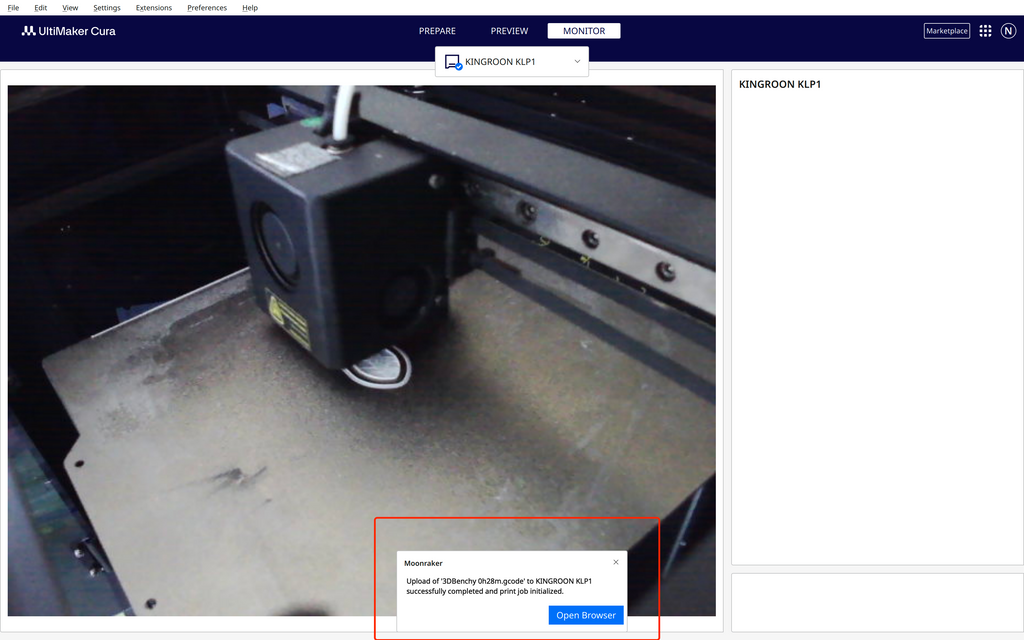
The printing should start when it is ready. If you use a webcam and had it added, click to “MONITOR” on the top, you can see the printing now. And you will see a notification that shows the uploading successful.
All right, that is all for the UltiMaker Cura, hope we can have Klipper dashboard in it soon, like the Orca Slicer.
PS: If your KP3S Pro V2 or KLP1 profile lost in the list after updating Cura, just follow the related article in the “Part 1” to add it again.
Part 3 PrusaSlicer
The PrusaSlicer is the second slicing software that we recommend for KP3S Pro V2 and KLP1. It is more powerful, with more features and most importantly, giving them better performance. It is also much easier to set up remote printing.
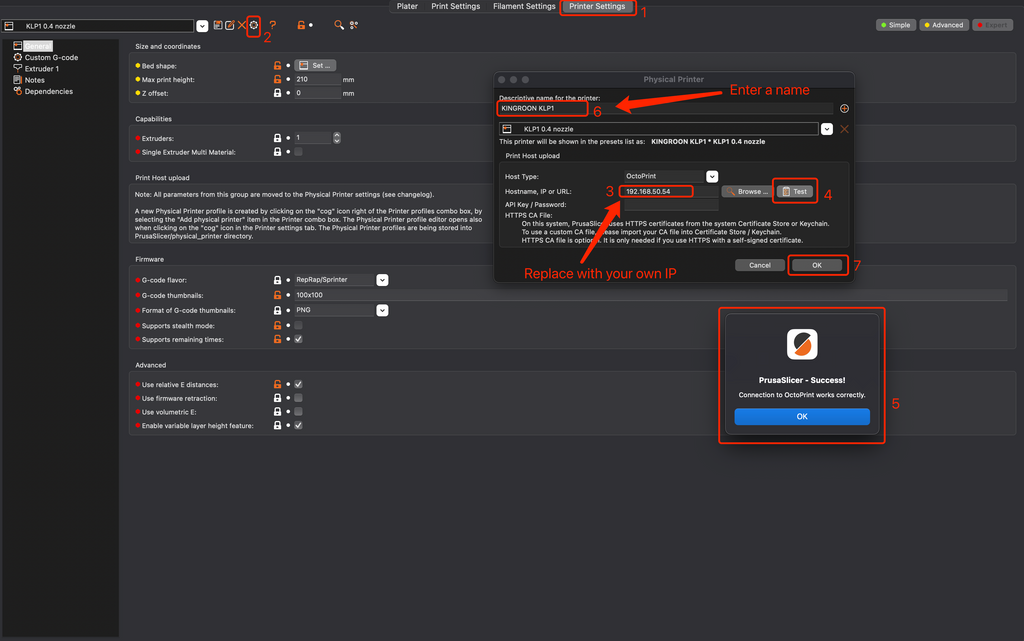
3.1 Step 1 Add printer information in the Printer Settings
Go “Printer Settings”, click to the gear icon, then add the printer’s IP address into the URL area. Then click to the “Test” button to check the connection. If everything is right, you will see a window with success notification. Name the printer and click to “OK”, your printer are ready to print remotely via PrusaSlicer.
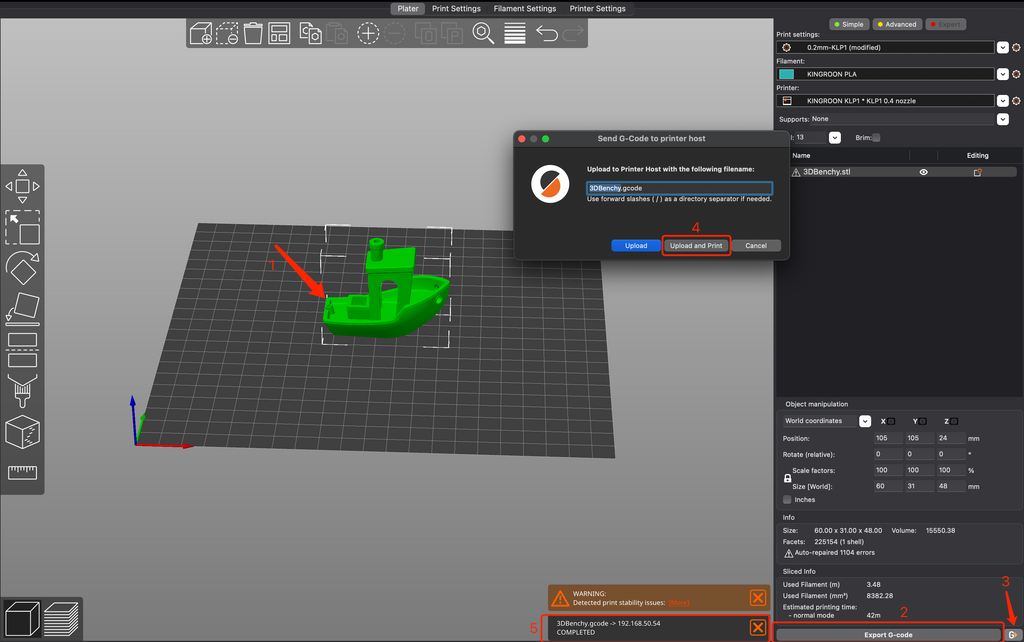
3.2 Step 2 Slice and print via PrusaSlicer
After that, you can drag anything you want to print to the slicer, slice it directly. Just make sure the right selected printer is the correct one, it should show as a physical printer.
Once you sliced a file, click to the gear on the right side. Then you will see a popup window with options. Click to “Upload and Print”, you printer will print it.
3.3 How to monitor remote printing in PrusaSlicer
Although setting in the PrusaSlicer is much easier than it is in the UltiMaker Cura, but to monitor the remote printing in it is not so convenient as Cura and Orca Slicer do. You need to click to the gear icon on the right side of the printer name. Then a window will popup, click yes, the slicer will open the Klipper dashboard in your browser.
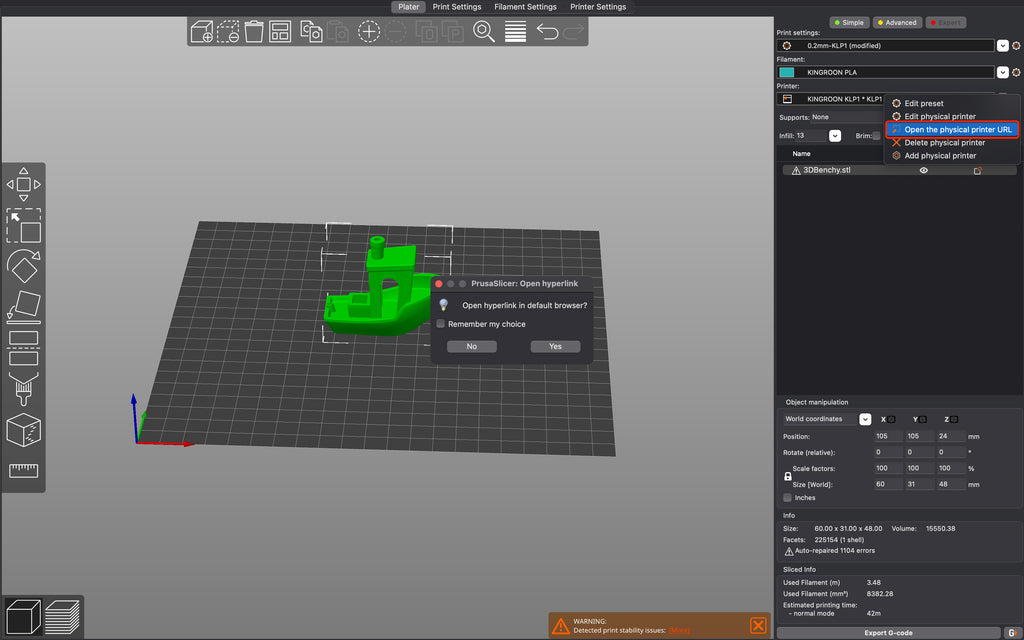
Let’s hope it can have a full Klipper dashboard as Orca Slicer do or at least a motor area as UltiMaker Cura do.
Part 4 Orca Slicer
Orca Slicer is the best and the fist slicing software we recommend for our KP3S Pro V2 and KLP1, it gives them the best performance. The slicer has the most features and can even have your printing materials compatible with your printer by a series of build-in quick-setup calibration process.
To see more about Orca Slicer using, click here: https://kingroon.com/blogs/3d-print-101
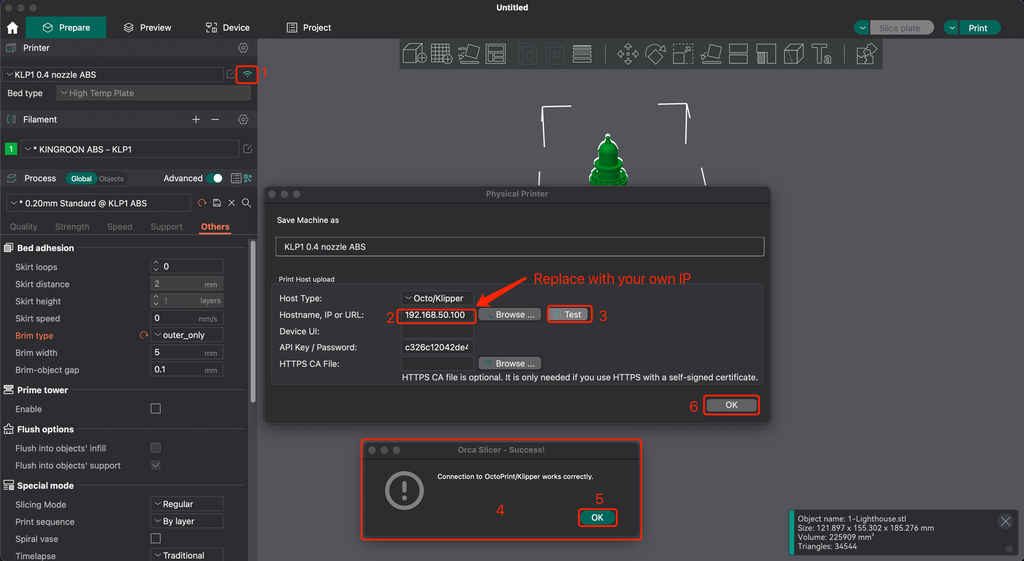
4.1 Step 1 Add IP Address in Orca Slicer
Click to the WIFI icon, then enter printer’s IP address into the URL area. Then click to “Test” button, the slicer will show a success notification window. Then you can click to the “OK” button to save the settings. Your printer is ready to remote print then.
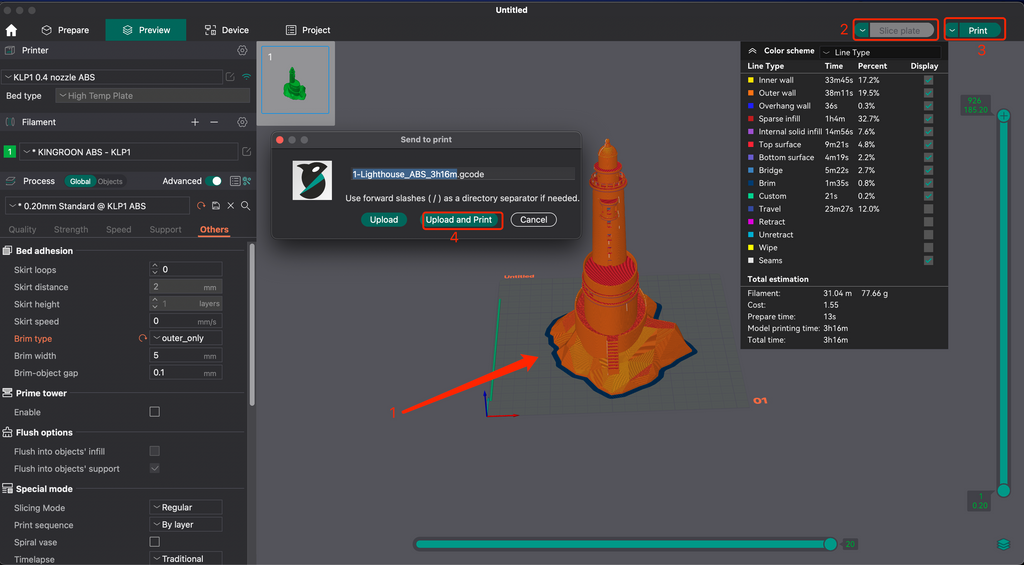
4.2 Step 2 Slice and print via Orca Slicer
After that, drag anything you want to print in to the slicer, slice it directly. Then Click to “Print” button, a window with options will popup. Click to “Upload and Print”, you are all set.
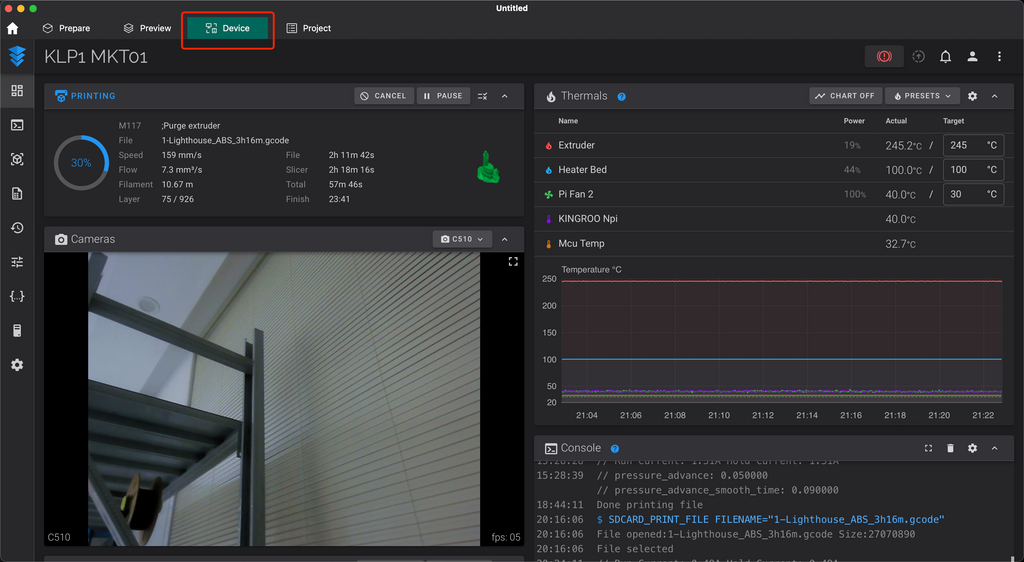
4.3 Step 3 Monitor remote printing in Orca Slicer
Then you can switch to the “Device” field, then you will be amazed by the full Klipper dashboard it has, you can control everything there.
Alright, that’s all for today’s tutorial. Just enjoy printing with the powerful Klipper firmware. Happy 3D Printing.


Useless guide, missing steps since it dosnt work.