KLP1 and KP3S Pro V2 3D printer users, once you received your printer and hooked everything up, you can follow this tutorial or the user manual to do the initial setup. Our engineers prepared everything you might need for Klipper in the system image, by doing this setup, everyone can use Klipper firmware like a pro.
Step 1, Connect to the Internet
You will find a USB Drive in the Package, everything you need has been prepared in it.
Just follow the below tutorial to set up the internet connection, then you can enter the Klipper Dashboard with the IP address:
Internet Connection and Wi-Fi Configuration on the KP3S Pro V2 and KLP1 3D Printers
If you are using the latest KINGROON KP3S Pro V2, it would be a little bit different. You can see the IP address from the screen, as long as your printer is connecting to the internet.
Step 2, Bed Leveling
Once you enter the dashboard, go to the “Macros” field, you can see some buttons in it. Those buttons are the presets our guy prepared for you guys, so everyone can skip some complicated command lines and use Klipper like a pro. But it might be changed, have problems or become unusable after updating the system. If you are not familiar to the Klipper project, please don’t modify anything via SSH.
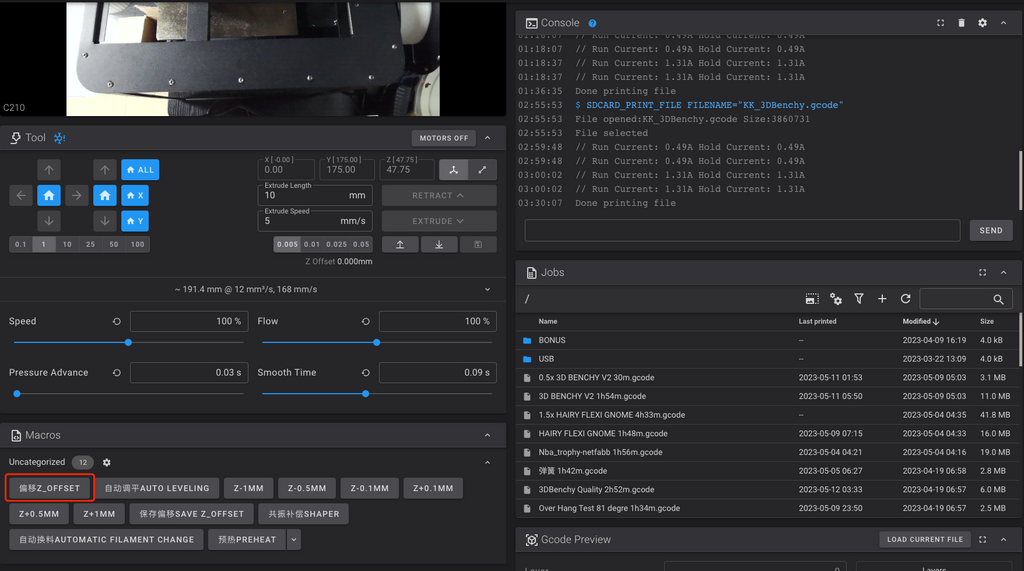
Click to the “Z_OFFSET” button, then your printer will start to move and stop above the center of the bed. And a chart will appear on your screen.
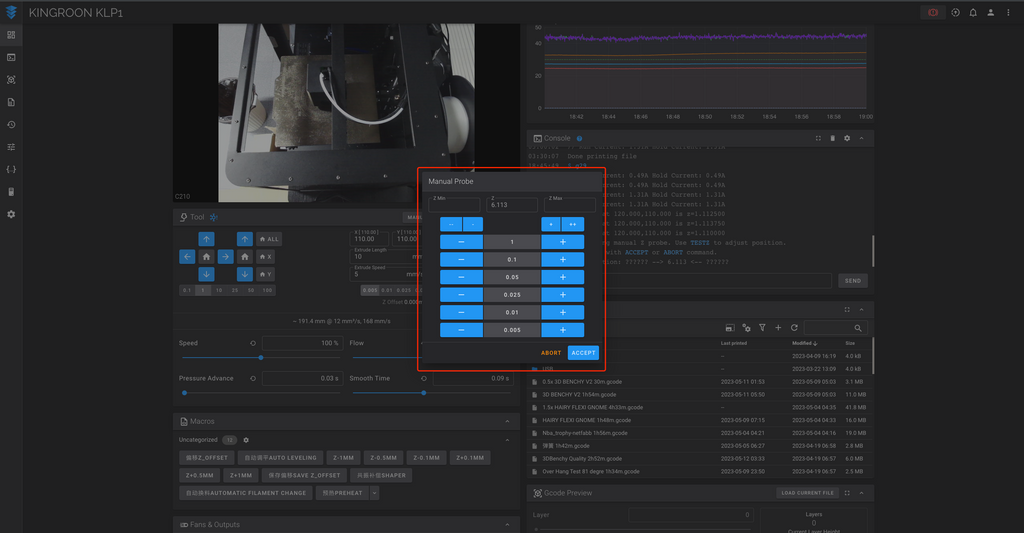
Click to the chart to adjust the distance between the nozzle and the build plate. Slide a paper between them, you will find the best one. Then click the “ACCEPT” button to save the settings. After that, click the to the “AUTO BED LEVELING” button to finish the process. It will measure 25 points (on KP3S Pro V2) or 36 points (on KLP1) and save the settings automatically.
Step 3, Input Shaper Setting
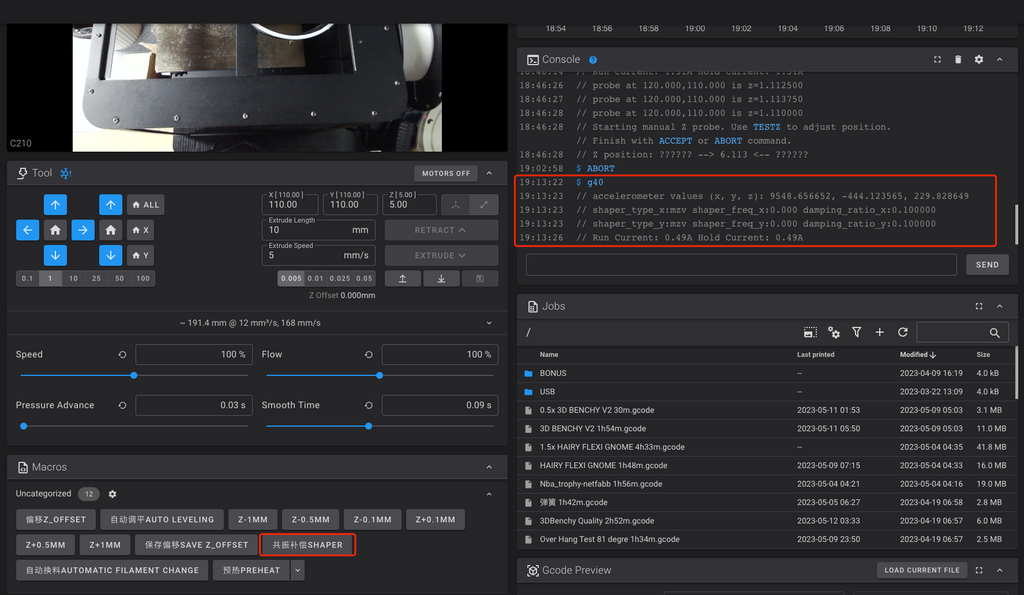
After that, click to the “SHAPER” button. The extruder will move to the center point above the bed, the object fan start to spins fast with noise and the extruder shakes. It shakes in in X-axis directions, then Y-axis, from 0 Hz to 100 Hz, finding the best input settings for both axis then store it automatically.
Step 4, Load the filament
Then click to the “PREHEAT” button to preheat the nozzle and bed. After that, follow the below tutorial to load the filament.
Filament Loading and Unloading on the KINGROON KP3S Pro V2 and KLP1
Step 5, Pressure Advance Settings
Go to the files field, find the “Pressure Advance.gcode” and print it. It is the file that tells which settings is best for printer. You can do that every time after changing a filament, if you have server requirements to the prints, but normally it would be unnecessary.
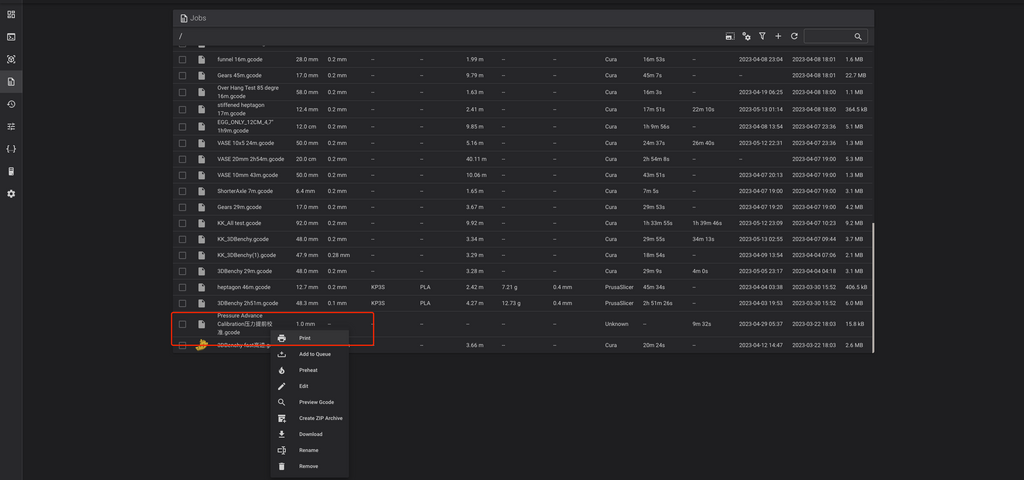
When the print is done, check the lines on the bed, find the best one, remember the value after that.
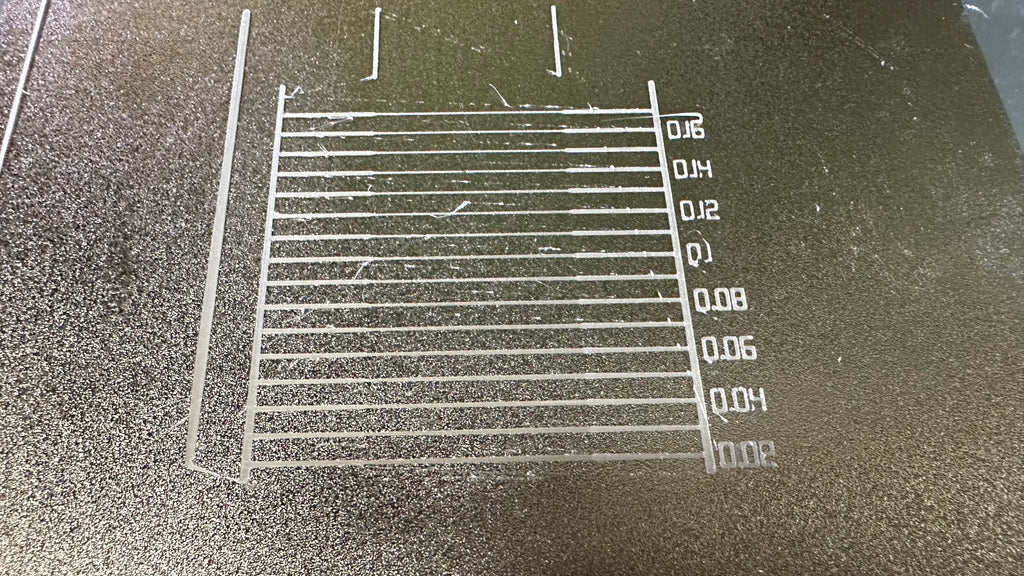
Then go to the “Configuration Files” field, find the “MKS_THR.cfg”, modify the values after “press_advance”.
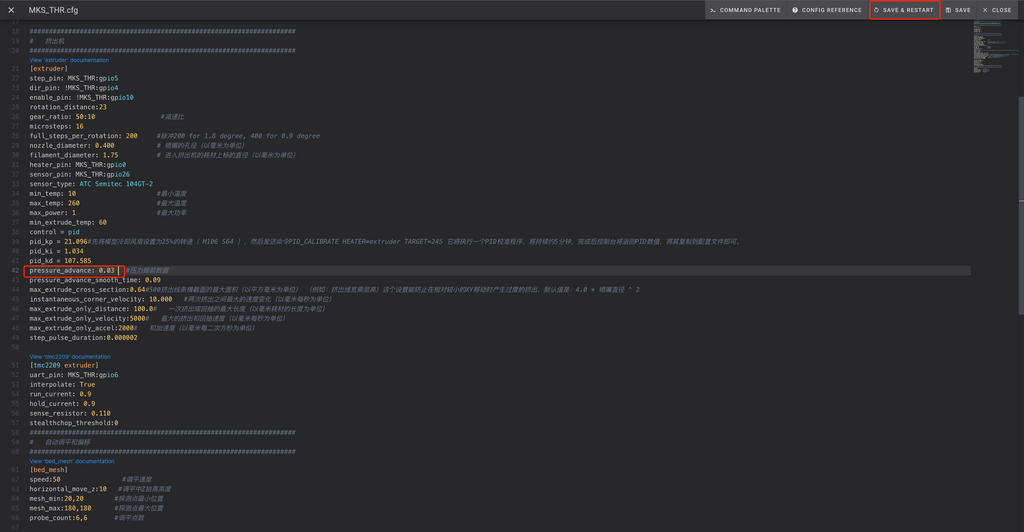
After that, click “SAVE&RESTATR”, you are all set. You can start to enjoy your printing now. The files in the USB drive could be your first prints to take a try.
Step 6, Add Printer Profile to Cura 5.3
For those who want to slice your own files, you can follow the below steps to add the printer profile to Cura. First, please make sure you are use the versions that is newer than Cura 5.3.
You can also find the files in your USB drive.
KP3S Pro v2:
- Put the "KINGROON_KP3S_PRO_V2" folder in the "share\cura\resources\quality" directory under the Cura 5.0 installation path.
- Place the " KINGROON_KLP1.def.json" file in the "share\cura\resources\definitions" directory in the installation path.
- Put the " KINGROON_KLP1_extruder_0.def.json" file in the "share\cura\resources\extruders" directory in the installation path.
- Put the " KINGROON_KLP1.STL" file in the "share\cura\resources\mesh" directory under the installation path.
- Close all open Cura software and reopen it, then add KP3S_PRO_V2.
KLP1:
- Put the " KINGROON_KLP1" folder in the "share\cura\resources\quality" directory under the Cura 5.0 installation path.
- Place the "KINGROON_KP3S_PRO_V2.def.json" file in the "share\cura\resources\definitions" directory in the installation path.
- Put the "KINGROON_KP3S_PRO_V2_extruder_0.def.json" file in the "share\cura\resources\extruders" directory in the installation path.
- Put the "KINGROON_KP3S_PRO_V2.STL" file in the "share\cura\resources\mesh" directory under the installation path.
- Close all open Cura software and reopen it, then add KLP1.
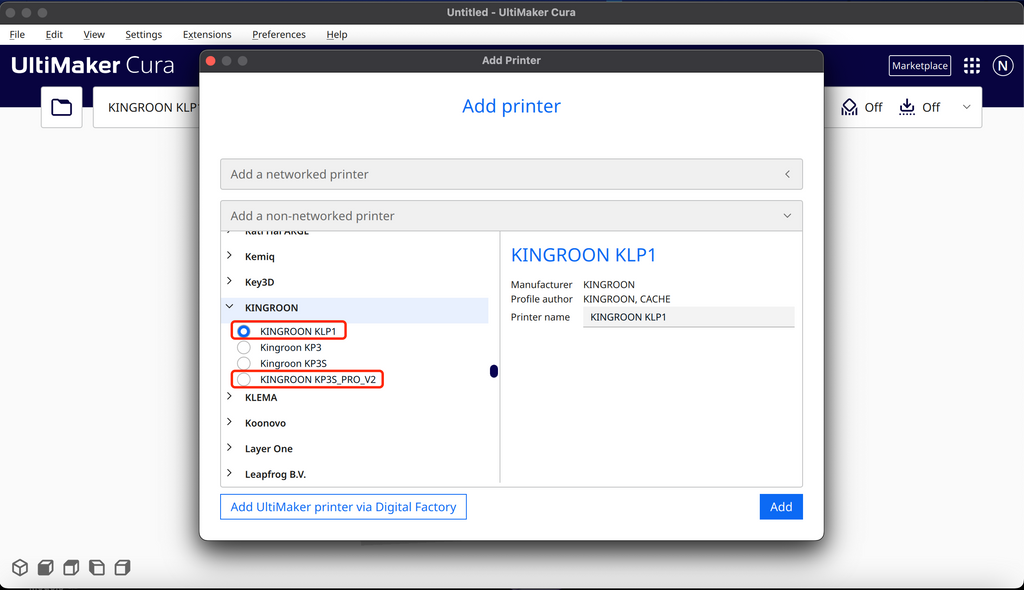
Then you should be able to add the printer from the list. Just slice and print, you are all set.
On my new Pro V2, the Z-Offset can’t be set low enough. It gets to a point where it moves down, then back up again, and won’t move any lower, despite the nozzle still being 1mm above the plate.
The z stop is much lower, so what’s stopping it?
“press_advance” is in [extruder] section of “printer.cfg”, not in MKS_THR.cfg
данное значение отсутствует “press_advance”