Since the KINGROON KP3S Pro V2 and KLP1 use larger gear ratios, you should not load the filament manually. Or you may get the extruder jammed. This article will show you how to load and unload filament on those two models.
KP3S Pro V2 Filament Loading
You do need to preheat the nozzle before loading or unloading the filament, the printer requires that to prevent clogged nozzles and maintain the printing.
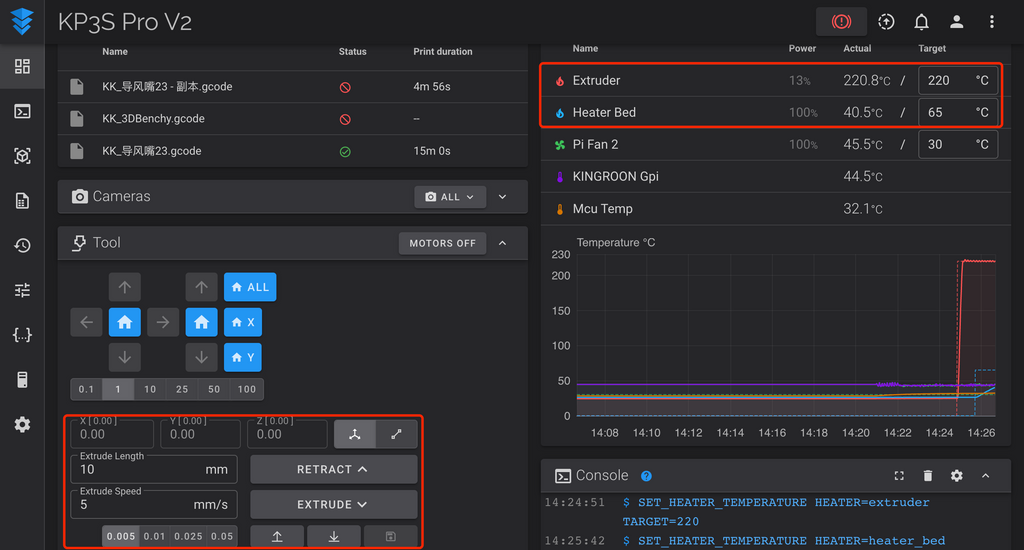
Go to the dashboard, you can control the temperatures and load and unload the filament from the marked areas。
Preheat the nozzle to 220 °C, and the bed to 65 °C so that you can start print after the process.
After that,you can hold the filament switch to Insert the filament in or take it out.
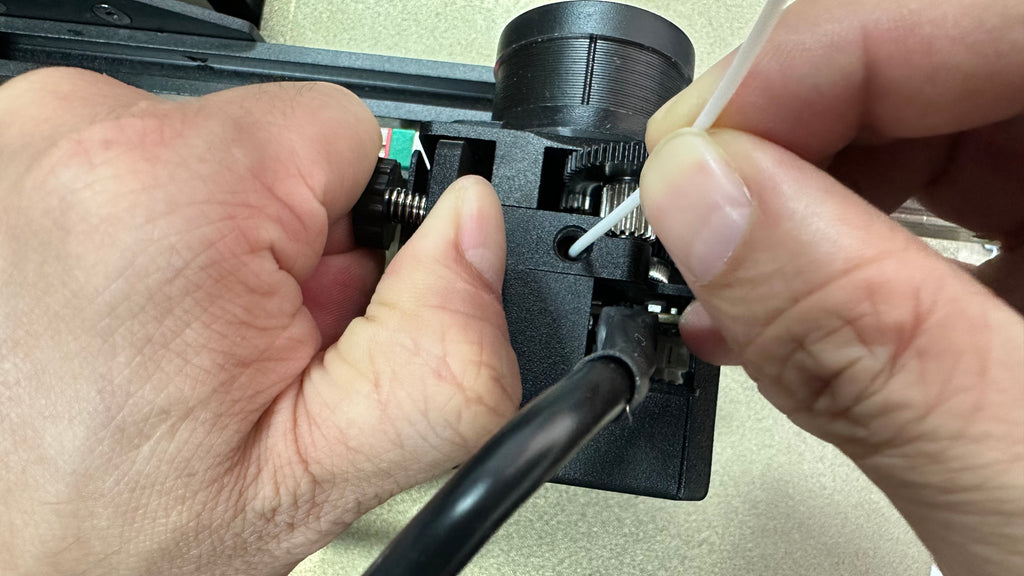
Once you feel the gears, you can stop and click “EXTRUDE” to load the filament. The default extrude length is 10mm, so you may need click quite a few times to see it out.
Once you see the filament come out from the nozzle, you can go head to print, or you need to check the above step and make the filament is catching well by the gears.
KP3S Pro V2 Filament Unloading
We use Macros to unload the filament, all you need to do is click the “AUTOMATIC FILAMENT CHANGE” macro.
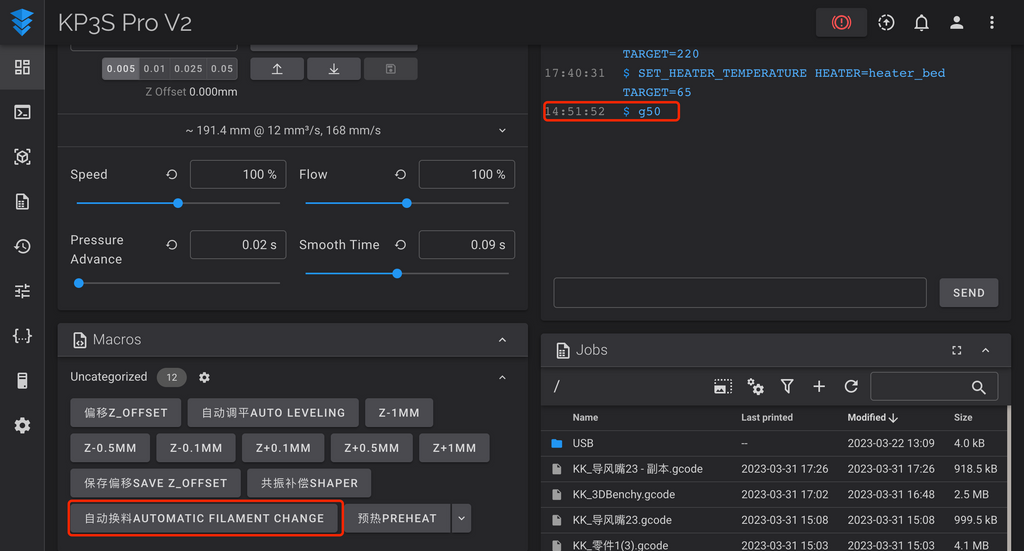
If the nozzle is in the required temperature, you should hear a sound from the extruder immediately. And you will see “g50” in the console field. If you click that when the nozzle is clod, it will preheat first.
After that, the nozzle temperature will start to drop. Once it becomes or near the indoor temperature, you can remove the filament directly.
KLP1 Filament Loading
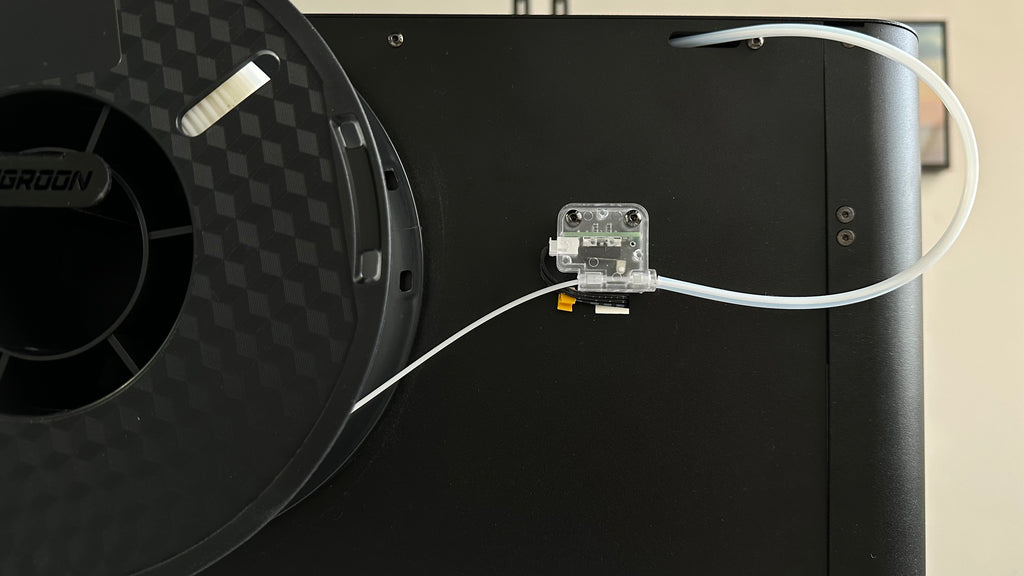
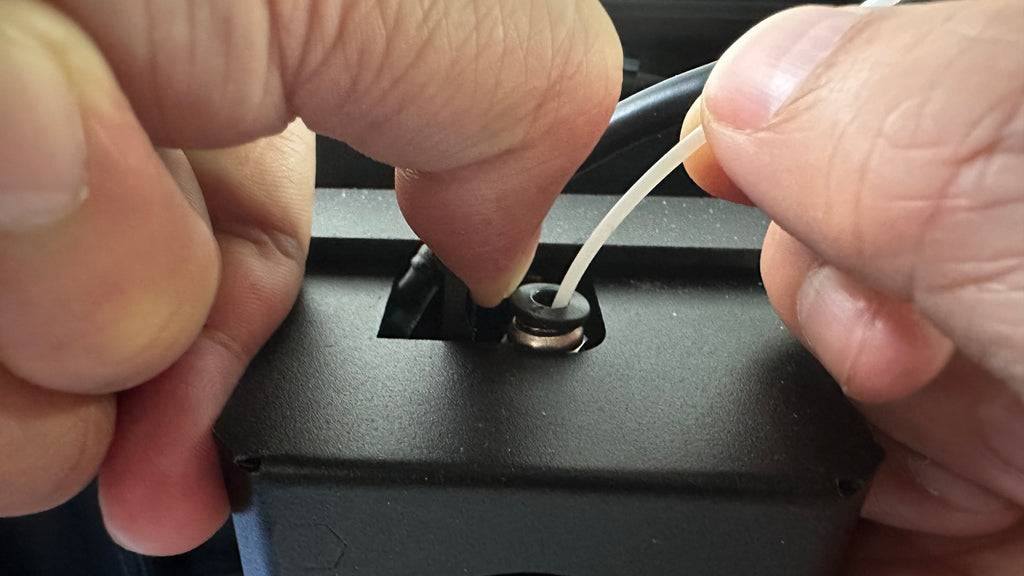
It is a little bit different on the KLP1. You need to turn the printer around and set up the filament sensor and lead the filament by the PTFE tube. The filament sensor actually works, you can put the filament in to trigger it or leave it alone. Once the sensor changes status, your print will be pause, but you can resume the printing from the dashboard later.
The same as KP3S Pro V2, you need to preheat the nozzle, too. You need to preheat the nozzle first.

Preheat the nozzle to 220 °C, and the bed to 65 °C, and wait for the temperature to reach.
After that, hold the filament switch and insert the filament in, it should be fine when you feel the gears hold it well.
Then go to the dashboard and click “EXTRUDE” to load the filament. It may take about 100 mm to extrude before the filament come out.
The filament should come out without any problems or you need to check the above step and make the filament is catching well by the gears. Then remember to put the PTFE tube all the way to the bottom.
KLP1 Filament Unloading
KLP1 uses the same macro to unload the filament, just go to the “Macros” field and click the “AUTOMATIC FILAMENT CHANGE” macro.
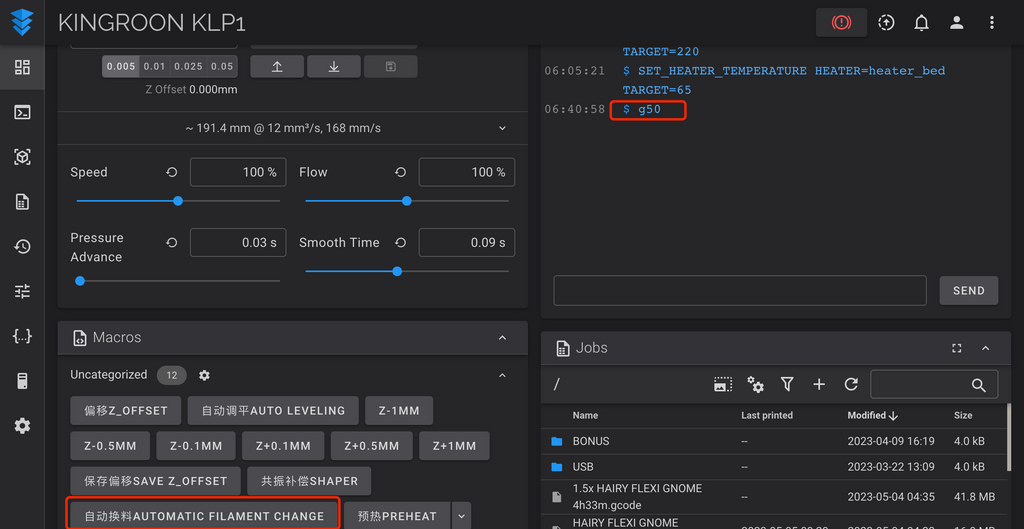
And it will be the same as the KP3S Pro V2, you will hear a sound from the extruder and see “g50” in the console.
Once the temperature drops to or near the indoor temperature, you can remove the filament and change it.
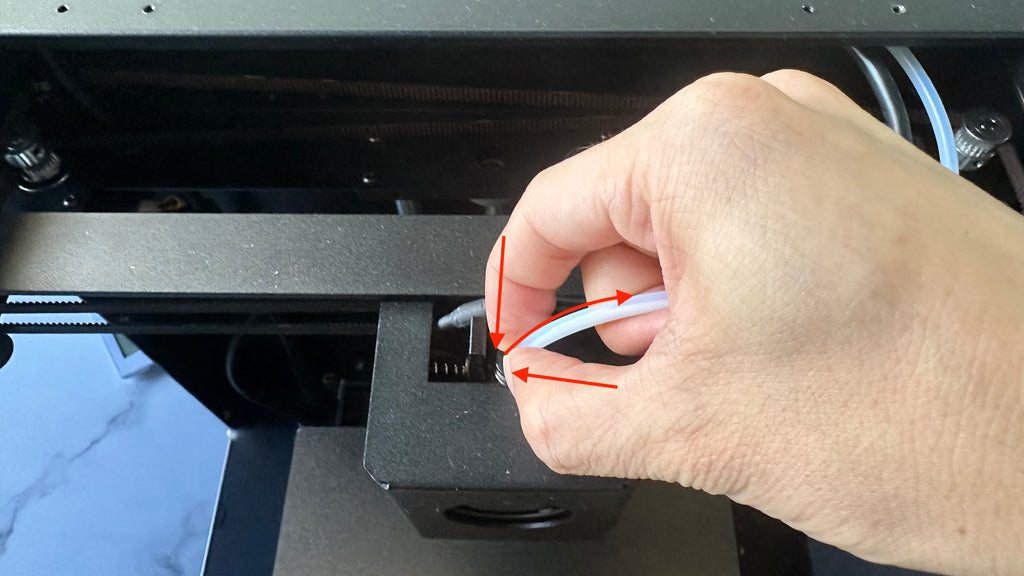
Use your fingers to press the pneumatic connector, it should make the PTFE tube removeable. Meanwhile, use another finger to drag the tube. After that you should be able to remove the it and the filament. Then you are all set.