
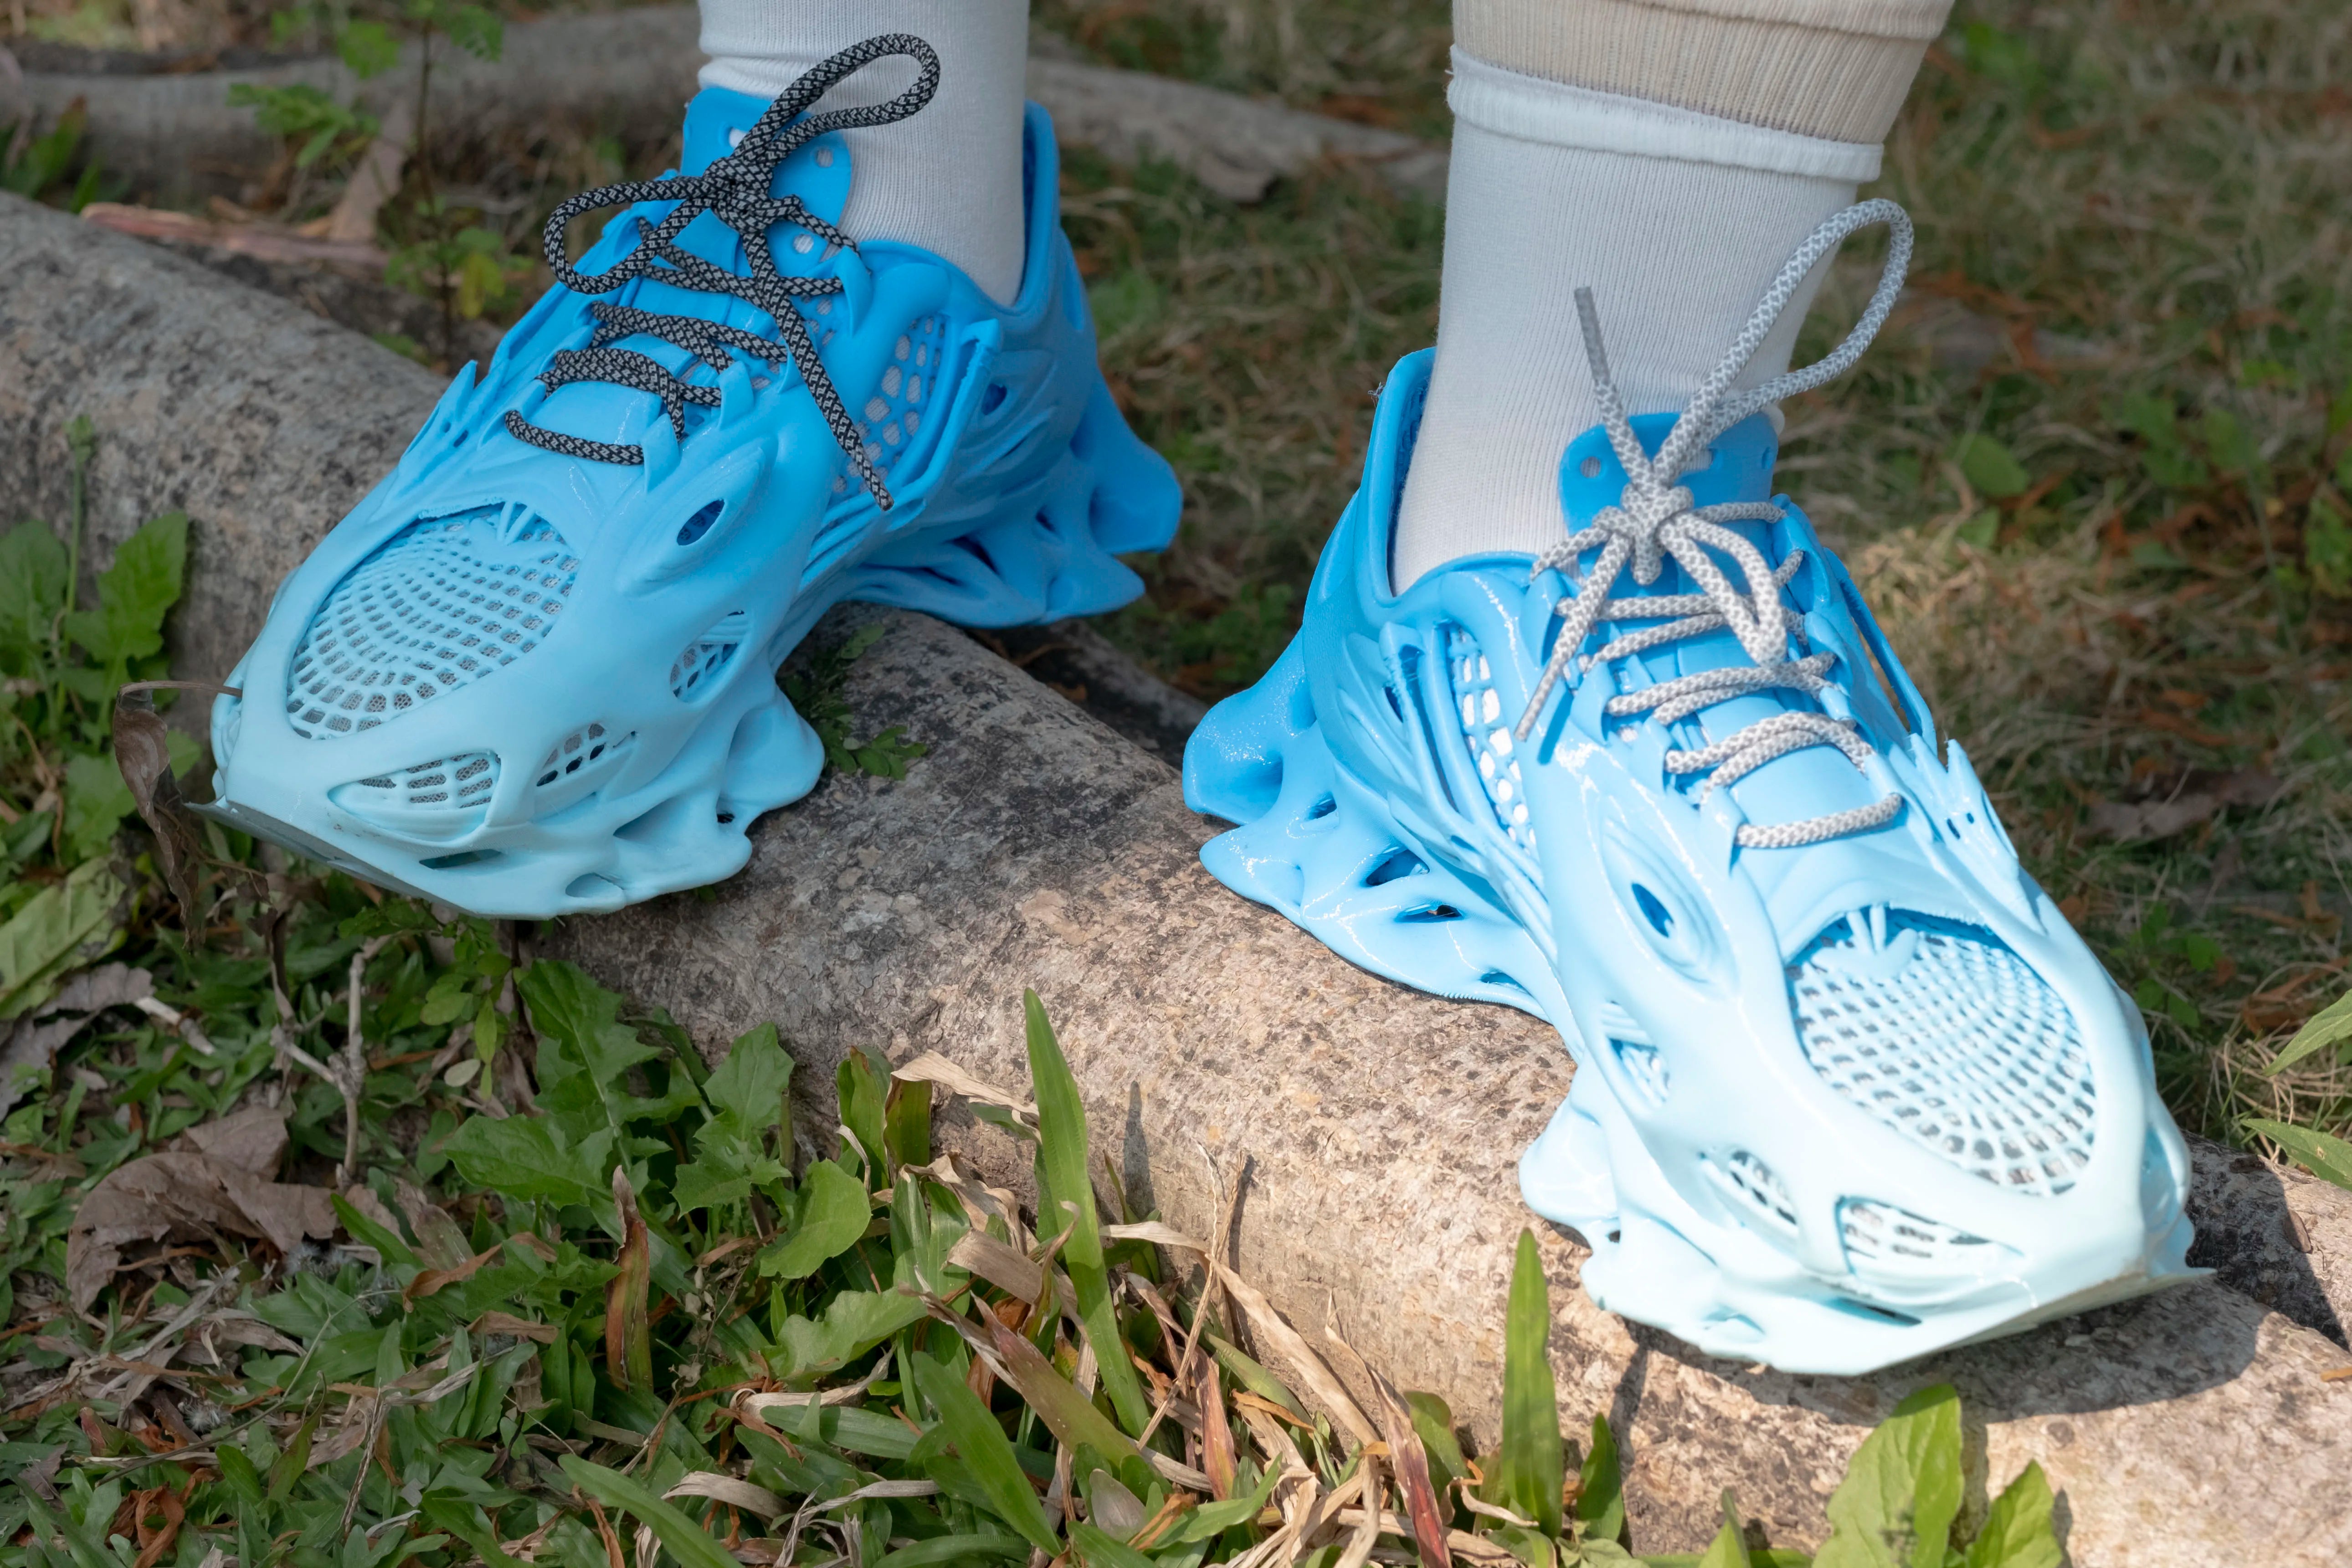
Since the launch of the Bambu Lab H2D, muti-material printing becomes possible and thanks to its famous displays many people start to want to print shoes. But TPU is not a normal material that we makers usually print. Drone flyers probably do as they need TPU as parts.
When you try printing TPU shoes, you will find it’s way more difficult than you thought. The worst thing is that the TPU required is also expensive. On average, a pair of shoes costs about 600-800g TPU90A, and its color changing, once the print fails in the middle, means you need another 41.99USD. You won’t want your shoes to look weird, so the rest of the filament cannot be used on your new shoes.
(Whaleberry - a 3D printed thick-soled casual shoe by CloudBerry)
The following tricks will help you print shoes on Bambu Lab H2D successfully.
Trick 1, Sizing the Shoe Correctly
Not TPU related, but most important for shoes. Figure out the correct size and modify it to fit your feet. Take the Whaleberry as an example; there is a detailed chart in the descriptions. Just modify the scaling ratio. If the average shoe size doesn’t fit well, measuring your foot length and foot width is necessary.

(Sizing Guide for 3D printed Shoes)
For this shoe remember to choose the profile that has more PLA support, it gives you better details.
Trick 2, Keep the TPU Dry
TPU is a filament that gets wet easily, which causes most issues in TPU printing. So, it’s usually dried before printing and is stored in a dry box while printing. According to Bambu Lab Wiki, TPU requires 8 hours drying at 65-75 ℃ before printing. It is even necessary for a brand-new filament that is sealed well.
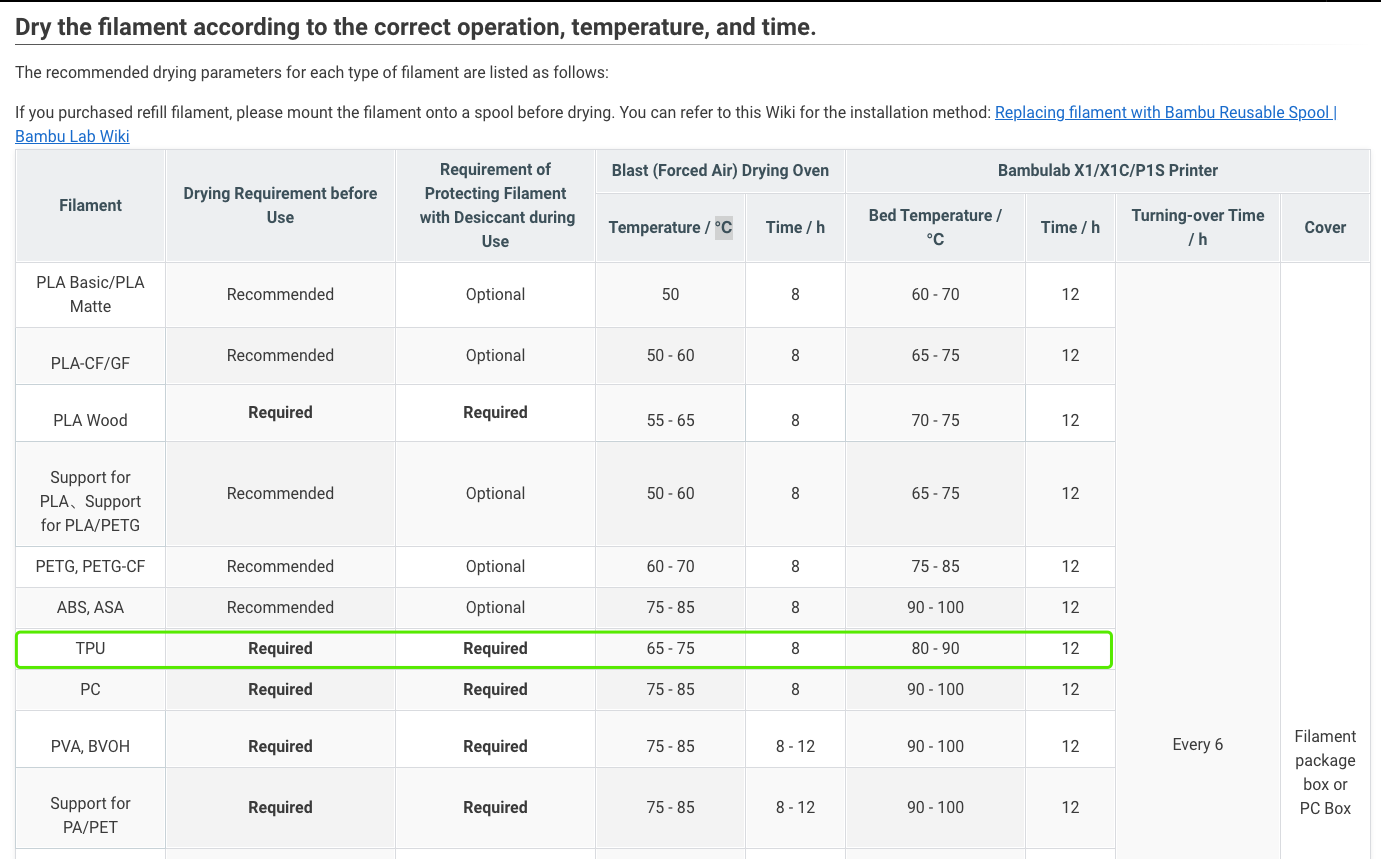
(Filament Drying Recommendations for TPU)
The best option is to get an AMS HT as it supports many high-end materials and belongs to the AMS system. I connect it to the right nozzle for a faster multicolor printing before I got the second AMS 2 pro.
If you don’t have that, third-party filament dryers are OK as well. Just dry the TPU as required, then start the setup.
Trick 3, Setup TPU Properly
Do not use normal TPU in AMS, it is too soft to be compatible, you won’t want to open it up. Setting up the TPU properly is important.
Put the filament inside the AMS HT or sealed box, then drag the filament thread out from the side for less resistance.
After that, go to the printer for further setup.
The H2D has a TPU-specific loading port, and can only print TPU from the right nozzle, so you need to disconnect the right nozzle PTFE tube from the normal port first. To do this, move the toolhead to the right side, and then you can access the yellow buffers. The right nozzle is on the top, with a gray PTFE tube. Hold the buffer and press the pneumatic connector to release the tube. Then put it into the TPU-specific loading port. Then you can start to load the TPU.

This could be tricky, if you need to switch often, getting a print to set up a TPU-specific PTFE tube is a good idea. You can find it in Best 3D Prints that Make Your Bambu Lab Printers So Much Better Part 3, the 13 print.
Trick 4, Reduce Resistance of Extrusion
Reducing resistance is an important trick for TPU printing. The TPU 90A and 85A are so soft, they require smooth extrusion. Even a slightly stronger resistance can cause issues, like under extrusion or a clogged nozzle, which will ruin the 3D printed shoes.
Ideally, the TPU should load from the top or at an easy angle to reduce the resistance as much as possible. Putting the AMS HT beside the AMS 2 Pro, like many others do, will not work; I’ve tried it. Either put it on the external rack on the left side.

(TPU loaded from an easy angle)
TPU filament spool rack By KK_Wang: https://makerworld.com/en/models/1155832-tpu-filament-spool-rack#profileId-1160985
So, you will need the above TPU filament spool rack to lift the AMS HT or dry box. It was designed for H2D specifically; Just print a full-size version and assemble it, and the height will be just fine.

(TPU filament spool rack By KK_Wang)
For TPU 85A, you need to remove the top panel and load TPU directly into the right nozzle extruder.

(TPU85A loaded from the rack)
For AMS HT users, I have a great tool for you. PTFE Tube Clamp for AMS HT By fpfdesigns: https://fpfdesigns.com/ This tool helps to fix the PTFE tube when using the TPU-specific loading port, preventing it from dragging the TPU in and keeping a correct angle for filament loading.
(PTFE Tube Clamp for AMS HT By fpfdesigns)
Trick 5, Loading and Unloading Properly
Due to the new structures of the Bambu Lab H2D Extruder, loading and unloading the TPU filament manually helps to avoid a clogged extruder.

To load the TPU 90A, remove the right nozzle tube, then switch to the right nozzle and set the temperature to 250℃. Then put the TPU in and click the down button slowly, you will feel the filament is dragged in. Once you see the TPU come out from the nozzle, you are all set.
Then turn off the Flow dynamic calibration before printing shoes. You are all set then.
