
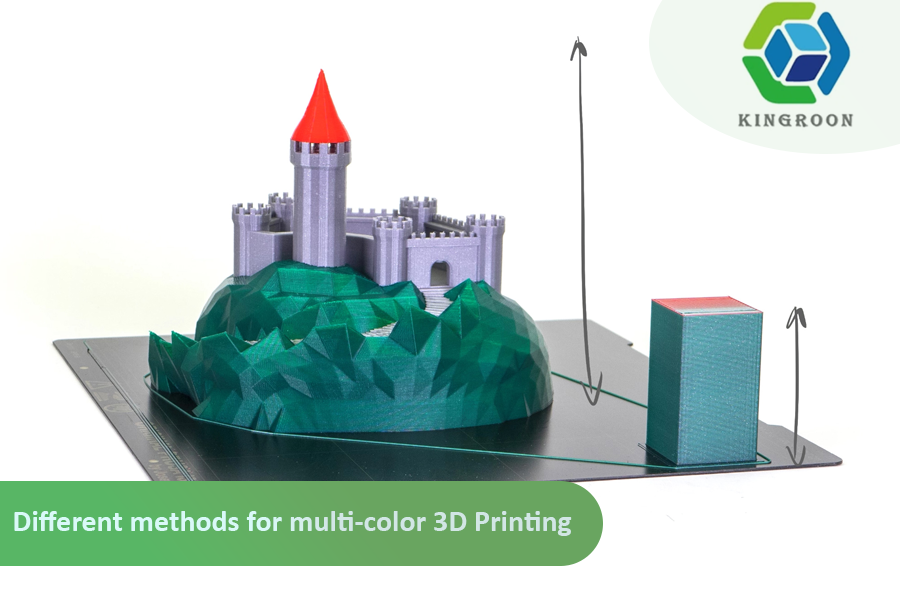
Multi-color 3D printing has evolved from being a niche novelty to a powerful tool for designers, makers, and engineers. This article takes you through various technical aspects of different multi-color printing processes, thereby providing you with an in-depth knowledge on their capabilities and limitations.
Manual Filament Swapping
Filament swapping by hand is based on the use of pause functions that are usually integrated in most 3D printers. Users are able to break the printing procedure at particular levels to change filament colors using this method. To ensure that color transitions are seamless, this technique requires careful planning and accurate timing.
Figure 1 (Source: https://antinsky.com)
The process starts with designing a model which has distinct color sections or complex patterns. Then slicing software like Cura or PrusaSlicer is used to insert pause commands at desired layer heights for color changes. The printer should temporarily stop when these commands are issued so that one can unload filament manually and load a new color.
Let’s say you were printing a two-colored phone case where there’s blue on the bottom part and yellow design on top. You would design your model accordingly into these two distinct sections, then using your slicing software put in place a pause command at that point where the blue base ends and yellow design starts. When it gets to this layer, you’d take out the blue filament by hand and put in its place, yellow filament.
However, manual filament swapping is time-consuming and error-prone despite being cost-effective and suitable for beginners. Precise timings are fundamental here as even minor delays could cause layers not adhering well or introduce blobs. It is mostly used when dealing with simple two-color designs or projects that require minimal color changes. If you are looking for some filament to try out multi-color filament, check out the highly affordable PLA filament or PETG filament available from Kingroon.
Bambu Lab AMS (Automatic Materials System)
Bambu Lab’s Automated Material System (AMS) changes multi color 3D printing by automatizing filament management. This additional component is placed on top of compatible Bambu lab printers and it accommodates multiple filament spools while making smooth filament changes through G-code instructions.
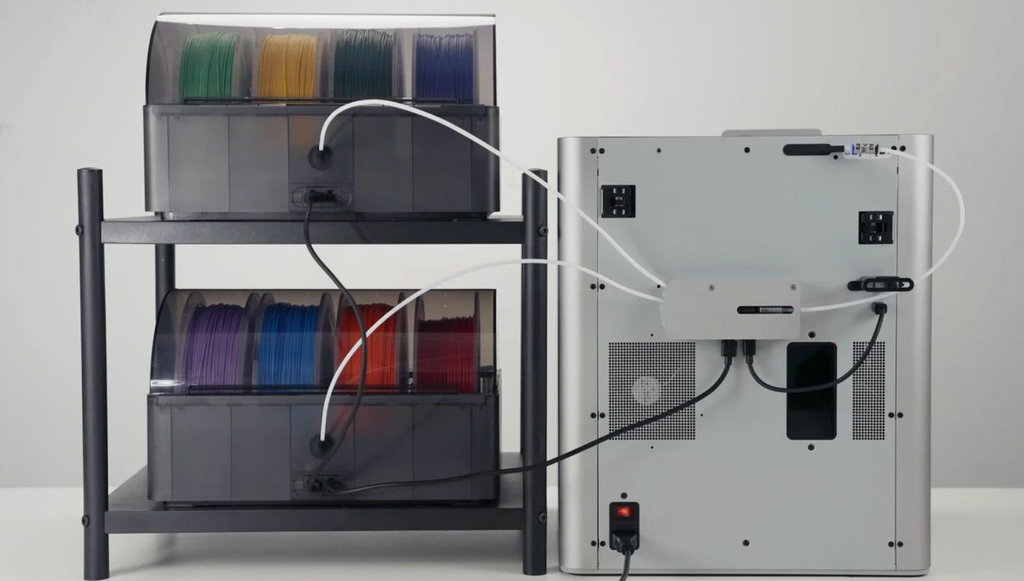
Figure 2 source: all3dp.com
Each AMS unit can store up to four filament spools, and four AMS units can be connected together to handle 16 filaments simultaneously. To create complex multi-color objects, as well as mix flexible and rigid filaments in one object for example. RFID technology is used by the AMS to identify each filament spool so that the optimum parameters are set automatically. The enclosure is hermetic, while humidity detectors prevent entry of any moisture on hygroscopic materials like nylon.
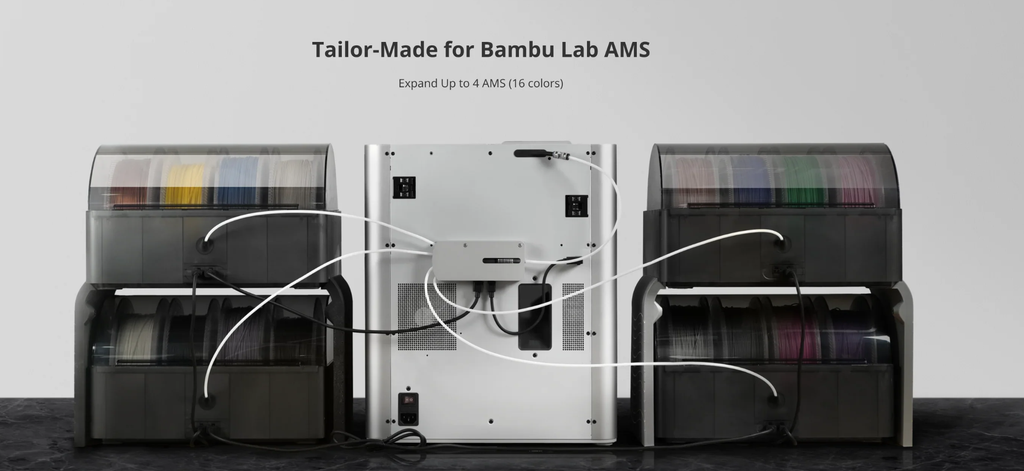
Figure 3 (Source: https://antinsky.com)
For instance, if you’re printing a model that requires four different colors, you would load the corresponding filaments into the AMS. Then use your slicing software to generate G-code instructions which will be used by the AMS to change between these colors when needed during printing process.
The AMS greatly simplifies the process of multi-color printing thereby removing manual involvement and reducing print time. It guarantees high quality prints through automatic color transition with its automated filament switching features. However, this adds to the cost of setting up a printer significantly and it only works with Bambu Lab printers.
Multi-Material for Advanced Users: ERCF
Multi-color 3D printing has been taken to a new level by Enraged Rabbit Carrot Feeder (ERCF) with an expansion to include multi-material. This allows as many as eight separate filaments including mixtures of rigid and flexible materials to be employed in one print.
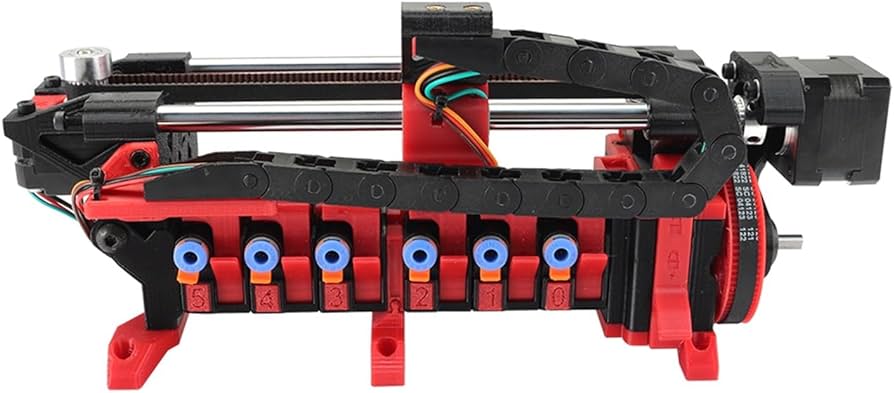
Figure 4 source: amazon.com
Like the AMS, the ERCF replaces filament automatically purging the previous material and loading a new one on per G-code instructions. The ERCF can also be adapted for use with other printers such as the Kingroon KLP1 or Kingroon KP3S Pro V2 even though it is widely used among Voron 3D printer users.
Imagine you’re working on a functional prototype that requires both rigid and flexible components. In this case, you could load PLA into the ERCF for the rigid parts while TPU would go in for the flexible sections, after which you switch between these two during printing. By using this technique, one will be able to ensure that each model component is printed with a correct type of plastic.
The creation of objects having distinct properties or intricate designs is possible through ERCF due to its unprecedented flexibility within multi-color and multi-material operations. However, setting up such system is not that easy because it needs some technical knowledge like tool change scripts, retraction settings and purge tower configurations available in slicing software.
Prusa MMU: A Dedicated Ecosystem for Multi-Color Precision with Prusa Printers
A dedicated ecosystem of multi-color 3D printing has been created by Prusa Research’s Multi Material Upgrade (MMU), which seamlessly integrates into PrusaSlicer – Prusa’s own 3D slicer software designed specifically for their printers. MMU3, its latest version allows five different filaments to be printed using it.

PrusaSlicer includes special functions meant help in managing MMU prints so as to minimize color assignment complexity as well as simplify wipe tower configuration. One of the biggest advantages of MMU is its tight interaction with Prusa printers, which provides a seamless experience in multi-color printing.
To illustrate, if you are using any Prusa printer that has an MMU3 to print a model with multiple colors, each part of the model would be assigned a color based on filaments loaded into the MMU3 through PrusaSlicer, after which this software would then generate G-code having the necessary instructions for the MMU3 to follow during printing.
In comparison to any other type of AMS or ERCF, it is user-friendly and reliable but supports fewer filaments and works only with Prusa printers.
Emerging Alternatives: Anycubic Enter the Multi-Color Arena
Anycubic has similar systems to AMS, promising cost-effective solutions compared to already-established market leaders. Anycubic has developed a multi-material upgrade for the new Kobra series (Anycubic Kobra 3) which can print 4 to 8 colors.
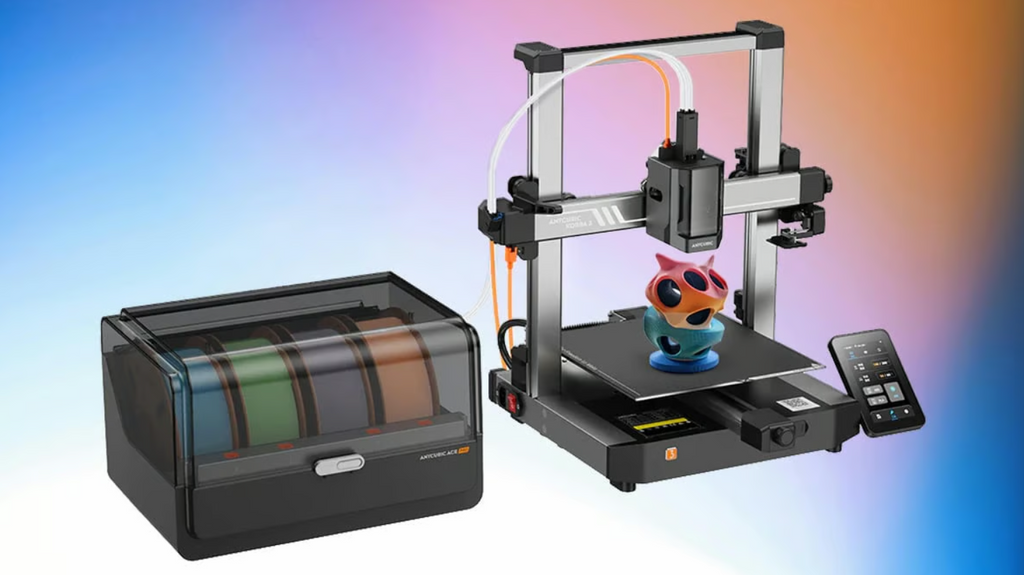
Figure 6 source: all3dp.com
It may be early days for these new systems, and their long-term performance and reliability need further evaluation. However, they indicate an increasing number of multi-color print solutions being available even for entry-level users.
Temperature Considerations in Multi-Color Printing
Though this guide concentrates on the different systems and what they can do, it should be noted that temperature is important in multi-color 3D printing. Each filament has an optimal printing temperature, and when you change filaments, you have to adjust the nozzle temperature accordingly.
For instance, if a printer is being switched from PLA (commonly printed at about 200°C) to PETG (about 230°C), it will need some time to adapt to the new temperature. This is where the “purge tower” comes into play. It is a sacrificial structure that is printed alongside the main object so that the printer can purge out residual previous filament and stabilize for new filament.
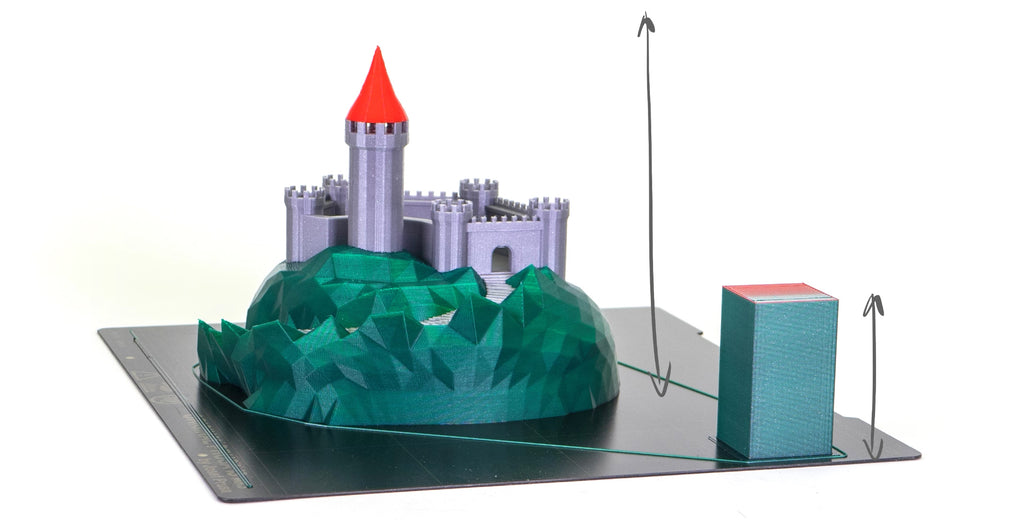
Figure 7 source: prusa3d.com
Purge tower parameters such as its size and amount of material used through purging may be set using slicing tools such as PrusaSlicer or Cura. By optimizing these settings, less material would be wasted while also reducing print time.
It’s worth remembering that one must master not only hardware and software solutions but also consider various subtleties connected with filament properties as well as temperature control within multiple colored 3D printing. By taking all these into account, beautiful multi-colour prints that make your creative dreams come true are possible.
Choosing the Right Multi-Color Solution: A Decision Based on Needs and Expertise
The best choice of a multi-color 3D printing solution depends on multiple factors including budgetary constraints, desired complexity level as well as technical skills possessed by users. Manual filament swapping fits within makers with limited budgets utilizing simple designs. Bambu Lab AMS which is an easy-to-use automated system with broad compatibility for materials falls under this category while ERCF provides ultimate flexibility in terms of multi-material applications albeit require high knowledge requirements. To cater for Prusa printer owners who want a dedicated ecosystem offering reliability there exists Prusa MMU. While Anycubic offer promising alternative for cost-saving purposes in the long run, its emergent systems are yet to be tested.
By carefully considering these factors, makers can choose the multi-color 3D printing solution that best aligns with their needs and empowers them to bring their colorful visions to life.
FAQs
- What are the main methods for multi-color 3D printing discussed in the article?
The article discusses several methods including manual filament swapping, the Bambu Lab Automated Material System (AMS), the Enraged Rabbit Carrot Feeder (ERCF), the Prusa Multi Material Upgrade (MMU), and emerging systems from Creality and Anycubic.
- What is manual filament swapping and what are its advantages and disadvantages?
Manual filament swapping involves pausing the 3D printer to change filaments at specific layers, allowing for color changes. It is cost-effective and accessible for beginners but is time-consuming and prone to errors due to the need for precise timing.
- How does the Bambu Lab AMS enhance multi-color 3D printing?
The Bambu Lab AMS automates filament management by housing multiple filament spools and handling changes automatically based on G-code instructions. It allows for seamless multi-color prints and reduces manual intervention, though it adds significant cost and is only compatible with Bambu Lab printers.
- What is the ERCF, and how does it differ from other systems?
The ERCF allows for printing with up to eight different filaments, including both rigid and flexible materials. It automates filament switching and is popular among advanced users for its multi-material capabilities, though it requires significant technical expertise to install and configure.
- Can you explain the function of the "purge tower" in multi-color 3D printing?
A purge tower is a sacrificial structure printed alongside the main object to allow the printer to purge the previous filament and stabilize the temperature for the new filament. It helps in minimizing material waste and adjusting temperatures when switching between different filament types.
- What are the key considerations when choosing a multi-color 3D printing solution?
Key considerations include budget, desired complexity of prints, and technical expertise. Manual swapping is suited for simple designs and low budgets, the AMS for a user-friendly automated solution, the ERCF for multi-material flexibility, and the Prusa MMU for users of Prusa printers. Emerging systems like those from Creality and Anycubic offer cost-effective alternatives but their long-term performance is yet to be proven.
- How does multi-color 3D printing impact the design and functionality of printed objects?
Multi-color 3D printing allows for the creation of objects with intricate designs and varying material properties in a single print, enhancing both aesthetic appeal and functional versatility of the objects.
- What future trends are expected in multi-color 3D printing?
The technology is expected to become more affordable and accessible as new players like Creality and Anycubic develop their multi-color solutions, increasing competition and driving innovation in the field.
Conclusion
From being just another fancy technology to becoming an affordable tool used by everyone involved in making things, multi-color 3D Printing has indeed come a long way. Whether you’re just looking to put some color into your hobby or designing high-stakes multi-material prototypes as an engineer, there’s definitely something out there meant for you among these machines.
This ranges from hands-on methods like manual filament swapping to advanced automation such as those found at Bambu Lab (AMS) and ERCF. In addition, emerging manufacturers such as Anycubic has been making the technology more affordable and accessible to a wider range of users who want to be part of the multi-color 3D printing revolution.
By understanding each technique’s technical details, considering your specific needs thoroughly, and becoming adventurous, you can easily navigate through this rainbow-colored world of multi-color 3D printing and open up a wide range of creative options.


