With all metal hotend, CHC heating ring, a 9500-ring cooling fan, 5:1 gear ratio extruder, CAN board with ADXL345 sensor, CAN-BUS cable, linear rails, pure Klipper firmware, and the enclosure structure, the KLP1 meant to do more. Printing ABS is now become available, once you get our latest Orca Slicer profiles, you can try it.

This tutorial will show you how to print ABS with the KINGROON KLP1 3D printer. If you are using the first generation, please upgrade the extruder and flash the latest system image first.
Part 1 What you Need to Prepare
1.First thing’s first. Use the enclosure.
The ABS is clearly poisonous, you must keep you and your family safe. You need to close the top lid and front door on your KLP1 and put the printer near the window so that the toxic air can be cleaned quickly, and the ABS can be print with its required stable temperature. It would be perfect if you can install an exhaust fan to suck away the internal air.
Also, you need to wear a mask when open the enclosure, the toxic air is not good for your health.
KP3S Pro V2 users, you can put the printer into an enclosure and try ABS, too.
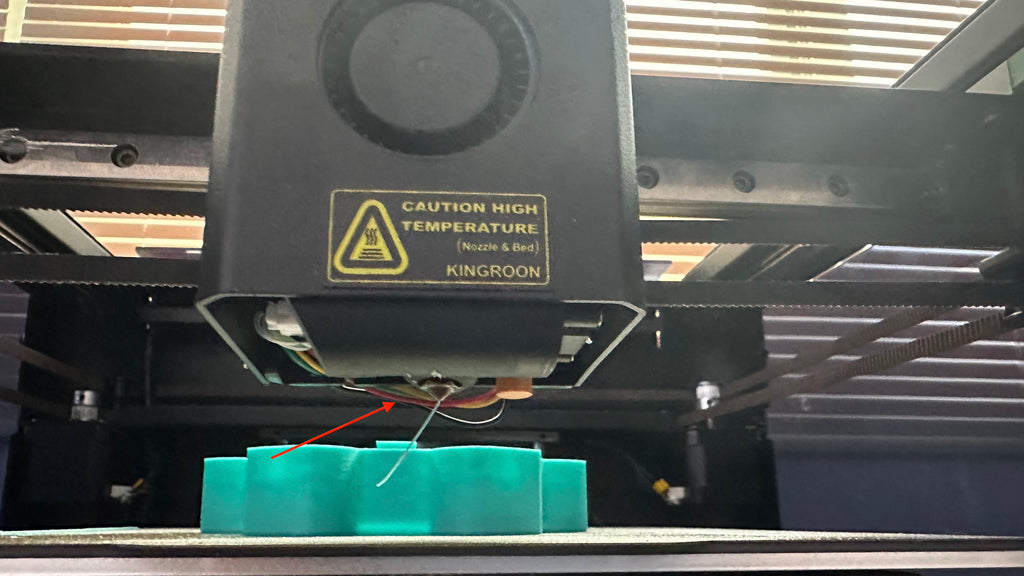
2.Check your printer’s connections and wirings.
As a printer weights over 14kg, it is hard to avoid shipping damages or any other related issues. Although the packaging has been improved a lot on the latest KLP1 and reduce the physical damage, it is still necessary to check the connections and wirings one your KLP1.
Mostly, you need to check the motor wires on the extruder, arrange them well to make sure the prints not reach them. Then the THR cable, make sure it’s connected tight.
3.Print with PETG first.
If you go with ABS directly, you will fail very soon. The original fan duct is printed by PLA, it gives you no change on ABS printing. So, you need to print with PETG first. Get yourself a PETG fan duct and replace it. Then you are free to go. The PETG fan duct survivors even you don’t replace it with the ABS one.
Get the PETG here: https://kingroon.com/collections/petg-filament
Get the ABS Here:https://kingroon.com/products/2kg-pack-abs-3d-printer-filament-fresh
4.Use glue stick or a build plate with super adhesion.
ABS get shrink easily and causing the wrapping issue. It is highly likely to cause a failed print and ruin your hotend. Use a glue stick on the build plate will help to avoid it.
Part 2 How to Print it
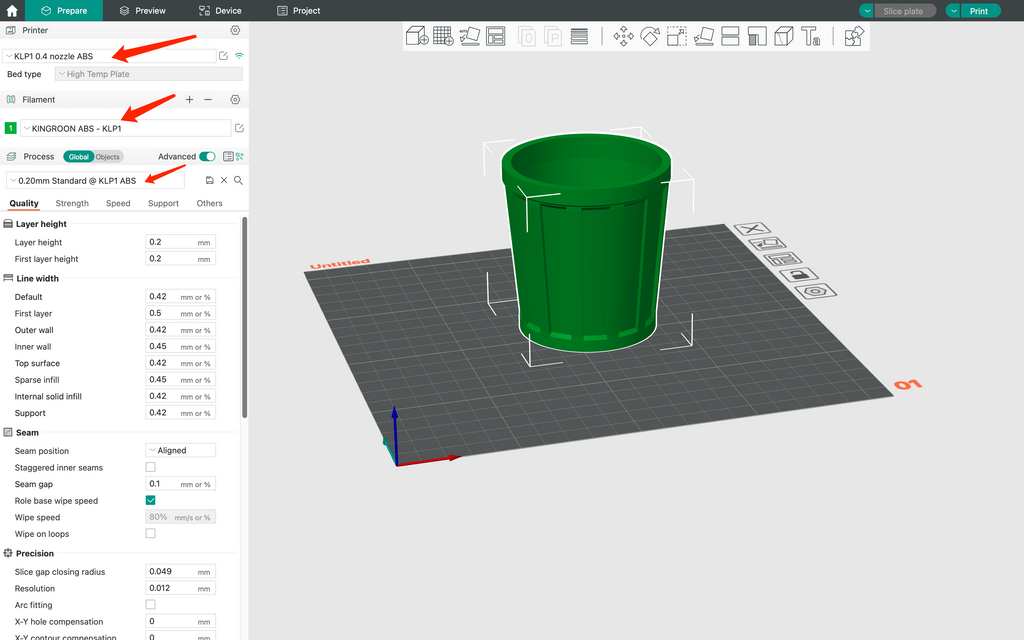
Download and import the latest profile from the below link then select the ABS profile. If you are using the KINGROON ABS, just slice it and print directly.
OrcaSlicer Using on Your KINGROON KP3S Pro V2 and KLP1/OrcaSlicer
If the prints act different or you are using a different ABS, please run Orca calibration process as the following tutorial shows.
OrcaSlicer Calibration, the Final Puzzle for KINGROON KLP1 and KP3S Pro V2
Once you finished the process, the updated profile should fit your KLP1 3D printer and material perfectly.
If the current fan duct is in PLA, please choose PETG profile then print a PETG one to replace it.
After that, use some glue stick on the PEI sheet, close the door and lid, then preheat the heat bed (100) and nozzle (235).
The temperature may be different based on the local environment and the result you got form the OcraSlicer calibration.
You can slice and print now.
Part 3 Settings
The KLP1 hotend can reach the temperature of 300 degree, for some versions of system images, it may be limited at 260 degree. In case you need it, please go check it in the “printer.cfg”, make sure it is 300 degree.
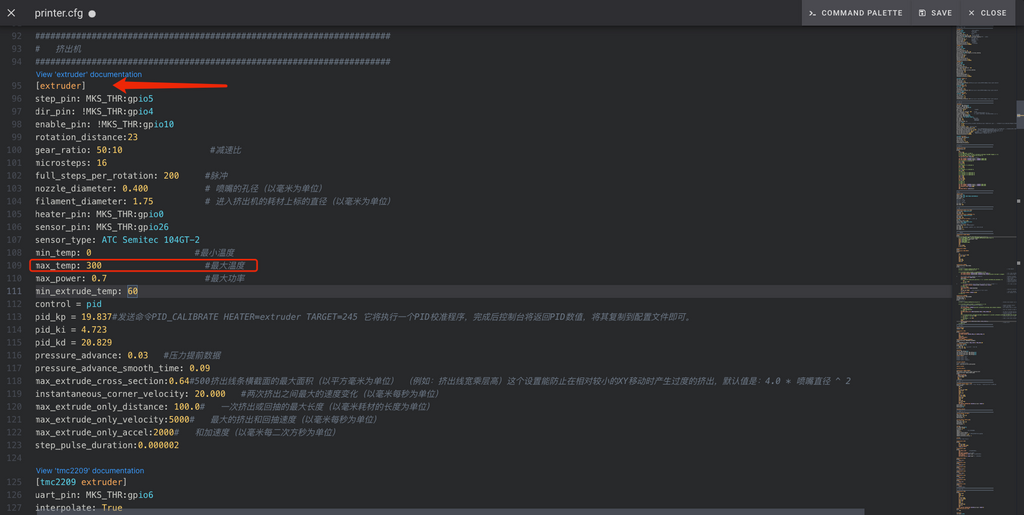
Then take reference from the recommend temperature on the spool, use it to run the temperature tower. The OrcaSlicer will help you find the best nozzle temperature.
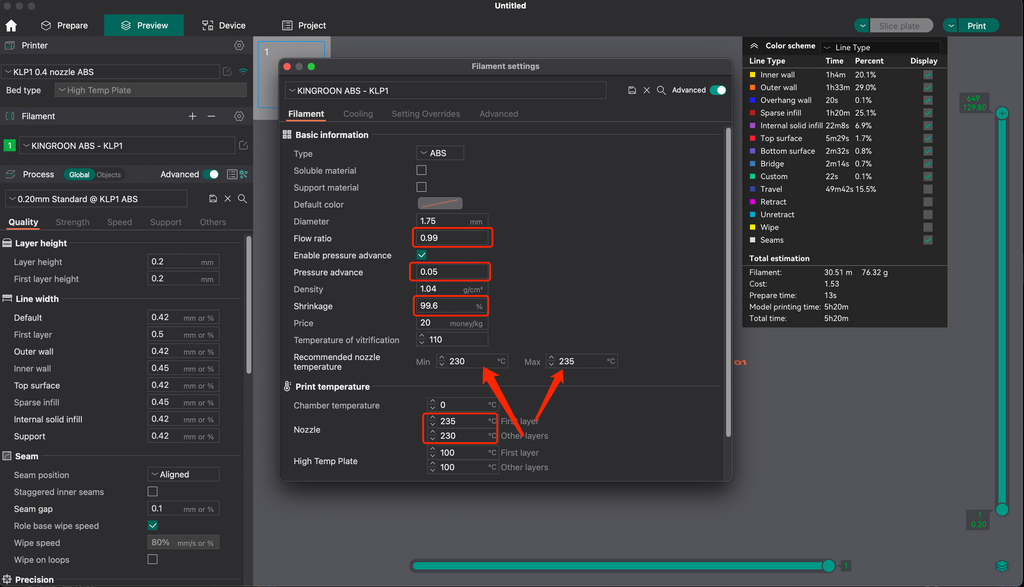
For example, the best result we got is 230 degree, then 230-235 degree are already enough for printing with the current ABS. After that, we got all the rest settings from the OrcaSlicer calibration.
OrcaSlicer Calibration, the Final Puzzle for KINGROON KLP1 and KP3S Pro V2
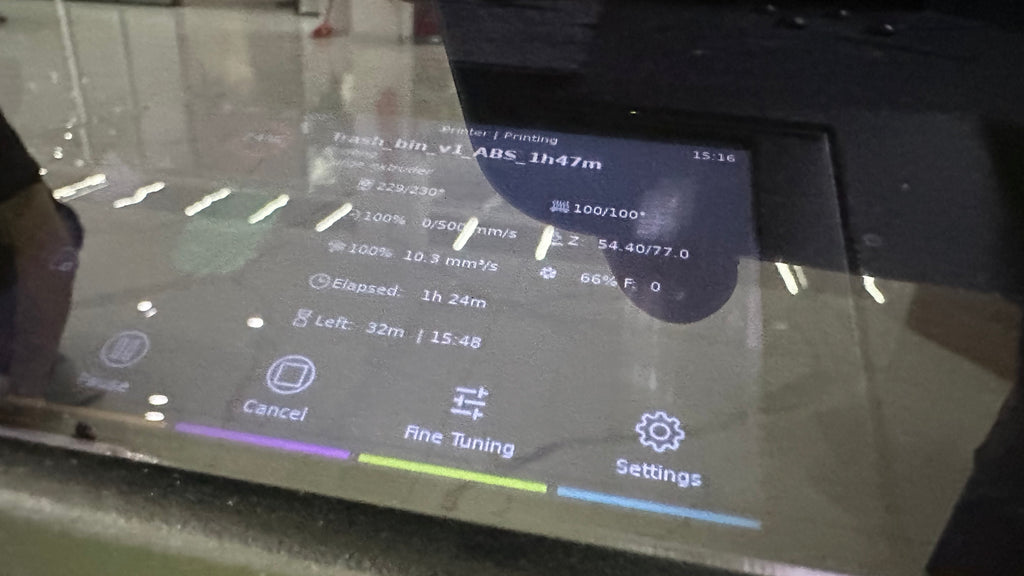
As for the cooling settings, we keep it as default settings that we get from the “Generic PETG”. If you haven’t got the latest fans and your KLP1 or KP3S Pro V2 was purchased from https://kingroon.com/ Please send us an email to get it.
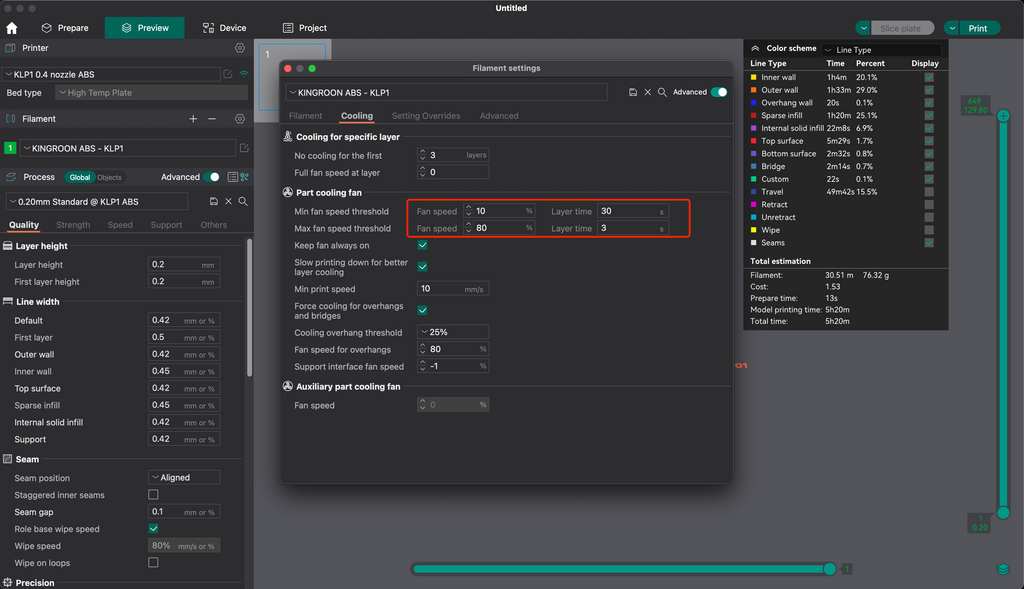
As we see from the photo, the fan speed needs to be adjusted. If your ABS filament from the system profiles, use it instead.
Adhesion could be the key for ABS printing. Using brim when print large objects is necessary.
Go “Others”, set the “brim type” as “auto” or others, the brim is enabled.
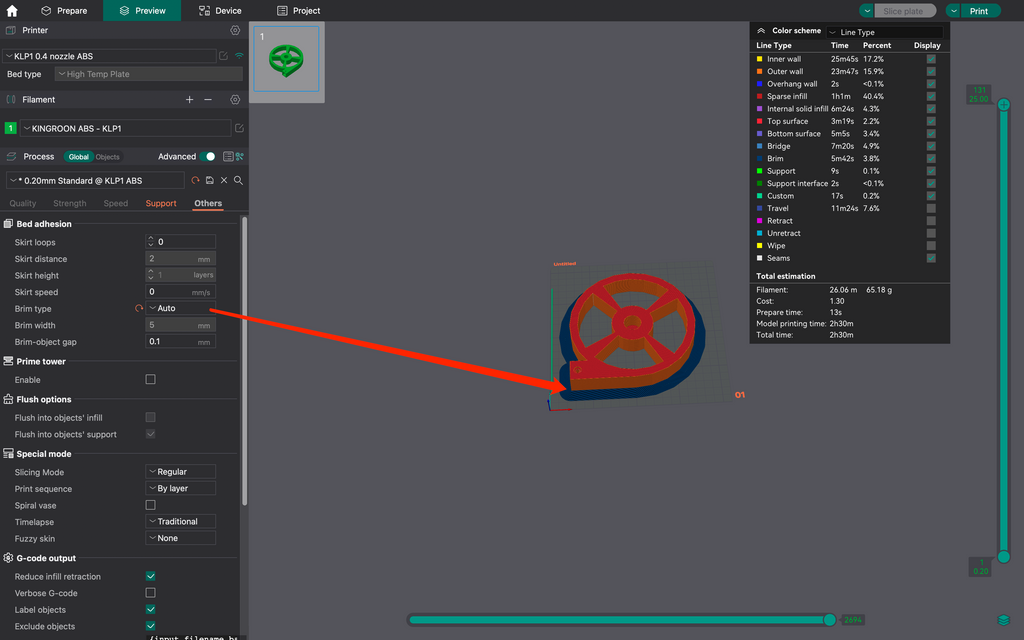
You are all set then.