For experienced and heavy users of 3D printing, filament dry box is certainly a necessary tool to keep filament dry. And dry filament is an important factor to carry out a successful 3D print. In this article, we'll guide you step by step to DIY a budget friendly filament dry box.
Why you need a filament dry box?
3D printing filament like PLA, PETG, and TPU absorbs moisture from the environment after being opened and exposured to air.
It won't be a problem if you use opened filament out in a few days at a dry and ventilated plate. But if you're printing at a wet environment or keep opened filament exposed to air for a long time, the filament will absorb too much mositure. When dampness of the filament reaches 35%, 3D printing stringing or bubbling tends to happen while you print with it.
This makes a filament dry box quite important for every dedicated 3D printing maker.
Get Started: Basic items needed for filament dry box making
Now, let's get this program started by preparing below items.
1. 3D Printed Parts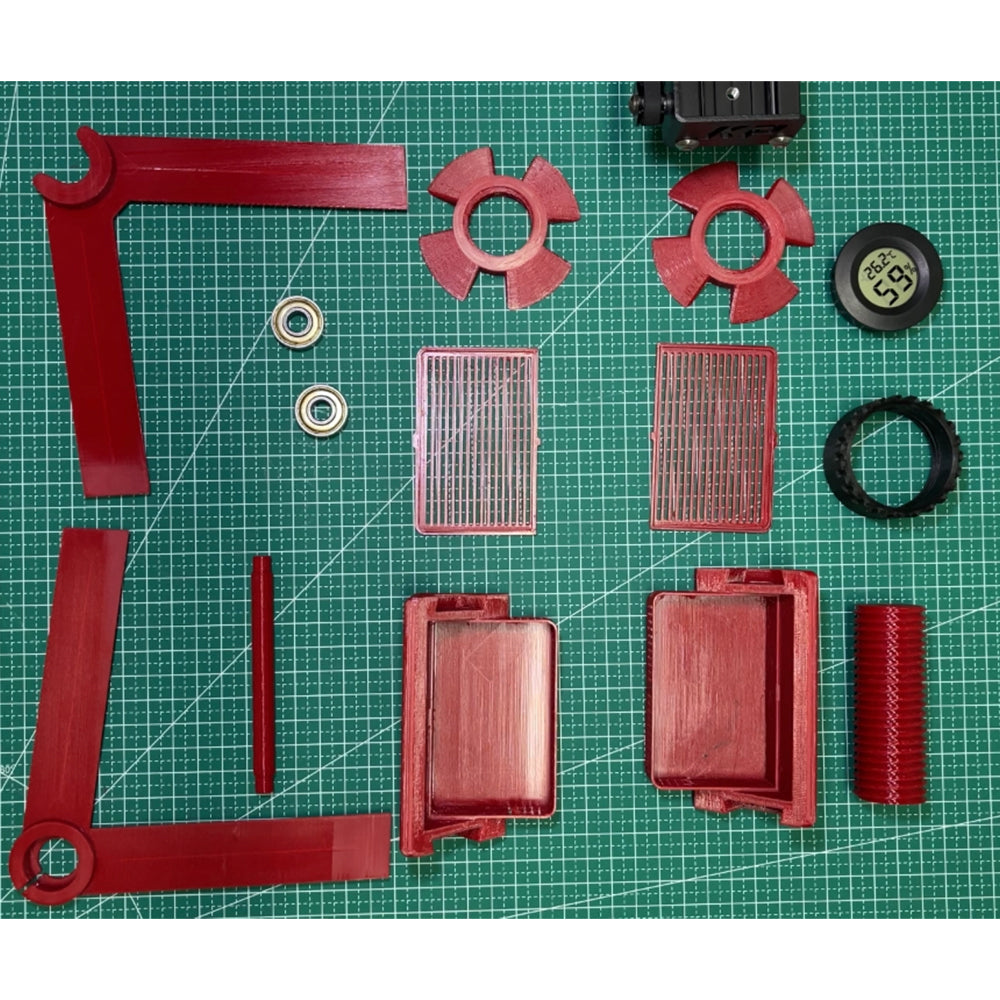
File link for the print: https://drive.google.com/drive/folders/1Vvye31VU7egRL2cWEDyXP82uIYqiAS51
Basic print settings:
Infill density for PLA: 100%
Infill density for PETG: 40%
2. 608 bearings *2
Bearings will give the filament spool a smooth rotating while printing.
3. Monkey Grips
Monkey grips will give a tight stick of the hygrometer onto the lid. For a better reading of the dampness show on the hygrometer, transpartent monkey grip is always the best choice here.
You can acquire monkey grip on Aamzon.
4. Reusable Silica Gel
Get some reusable silica gel, those in orange color which are non-toxic, from AliExpress. Put the silica gels in and out of the base, this will greatly absorb moisture and keep filament in a dry environment with a humidity under 10%.
When silica gel turns black, replace them with new ones. Used silica gel can be heated for reuse.
5. 8L Container (230*140*26mm)*1
Get a 8L container with the same dimension. Container in different size won't work in this program.
6. Tools needed for this program
Get a glue gun, a drill and a pair of sciccors in hand, and then we'll proceed to make a filament dry box on our own.
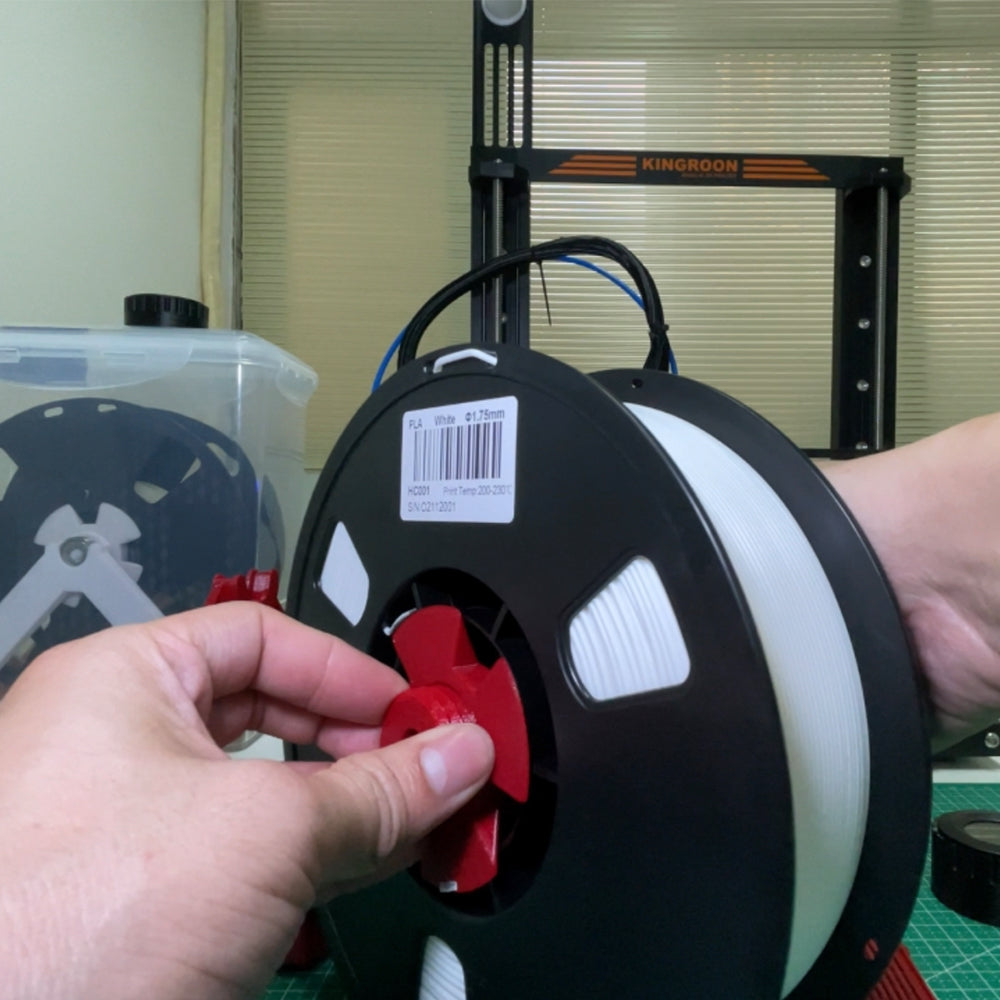
Assemble the filament holder
Let's get printed parts assembled to make a filament holder first.

Put the arms inside the notches. Use glue gun to stick it tight if it's too loose.
Glue a 608 bearing tight into the arm notch and the other one into the center of the stick.

Then mount the filament spool onto the holder with the printed screws and nuts.
Put the silica gel into the base containers and then put on the printed lids.

Now, let's put the filament spool onto the holder, and insert the center bolt to fix it.

Now we have the filament holder completed. let's proceed to the next section of DIY making the filament dry box.
Prepare the Filament Dry Box
Put some monkey grip onto the lid to stick the hygrometer tight under the lid.
Tips: you can gently press and hold it for a few seconds to make sure the hygrometer sticking tight onto the lid.

Drill the container in the left or right side and make sure filament can pass the hole smoothly.
Mind not hurting yourself during doing this.
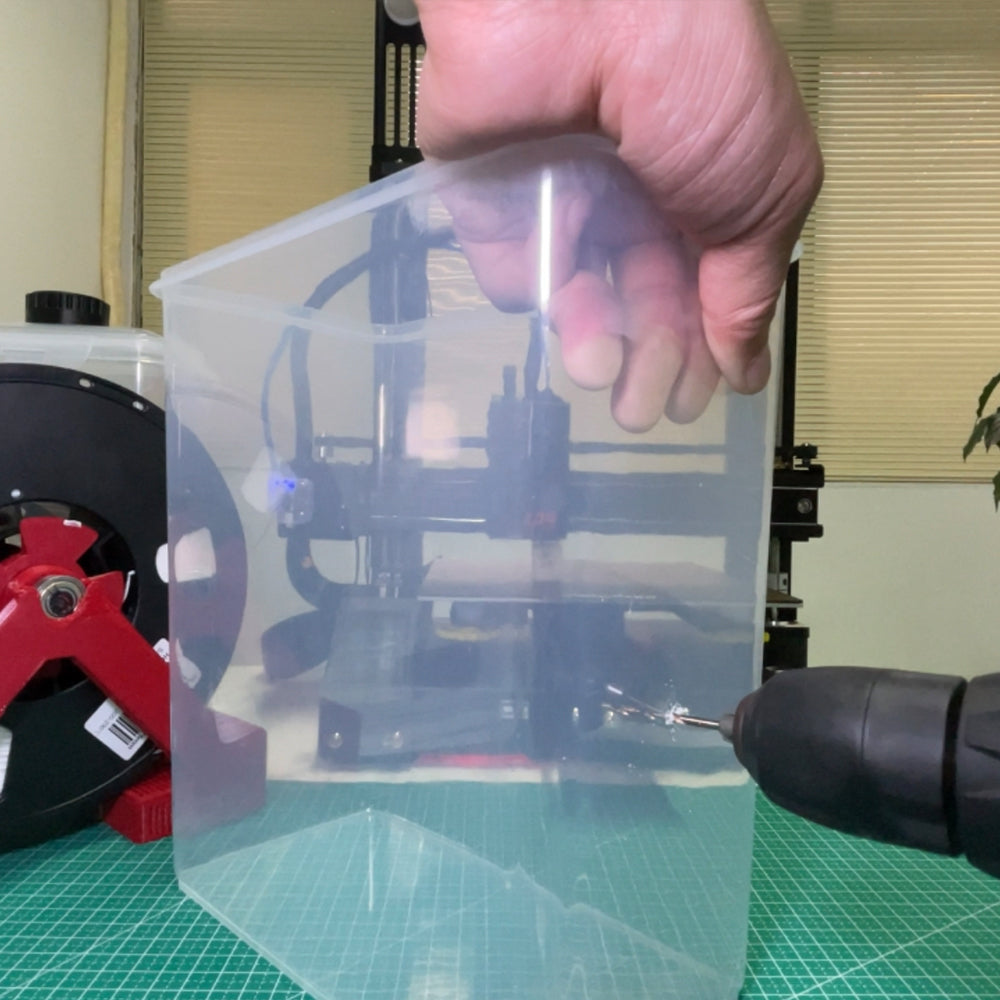
Now we get all done. Put the filament holder into box, and add some silica gel in and then pull out the filament through the hole.
