If your KINGROON KP3S Pro V2 (screen version) have any extrusion issue, this tutorial will help you fix it in 5 minutes.
Step 1, check settings
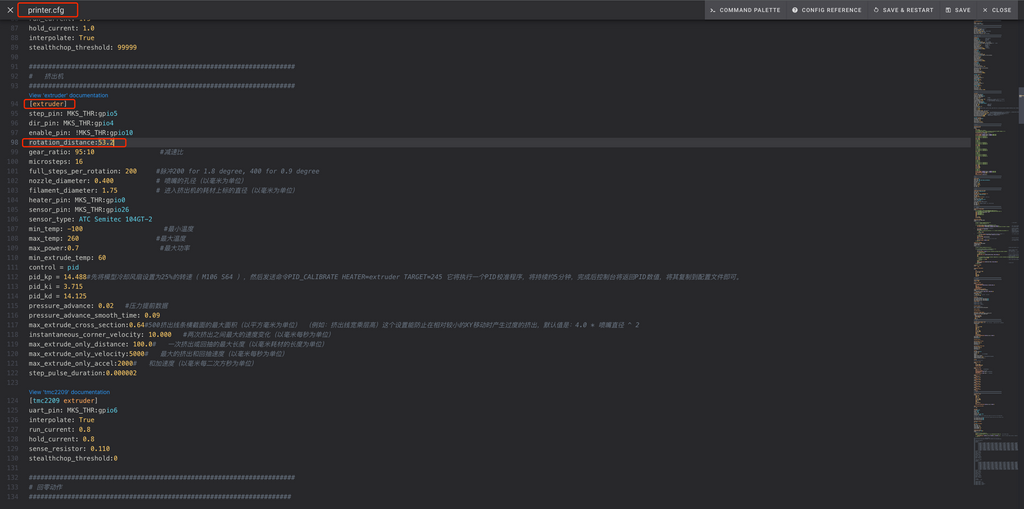
Before doing that, check the “rotation distance” in the “printer.cfg” make sure it is 53.2. A wrong setting here only affects the prints and won’t cause extrusion failure.
If you are using the older extruder kit, skip this tutorial. Or getting a latest extruder kit and flash the latest system image will help you use it:
After that, we can proceed the next steps.
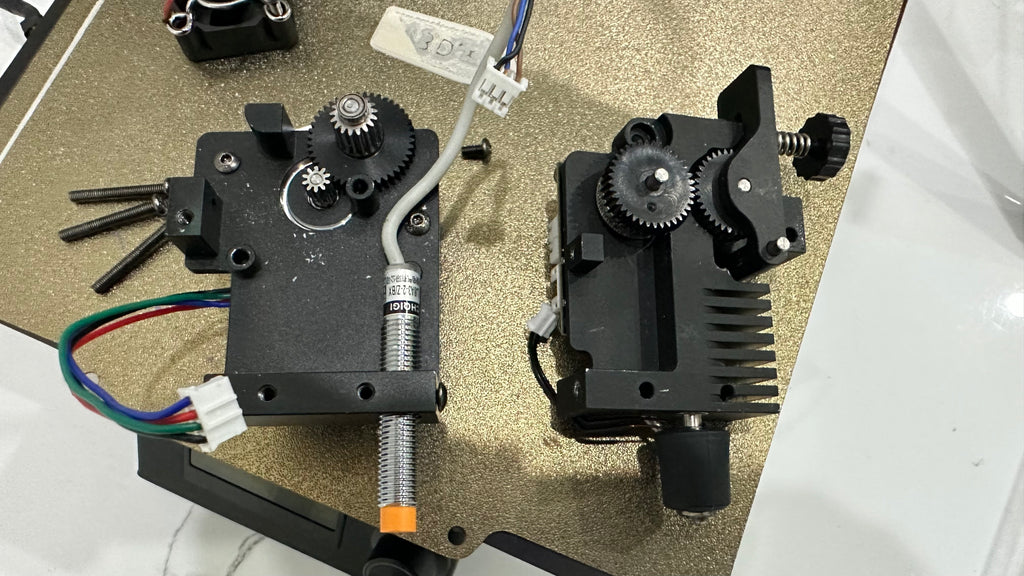
Step 2, Remove the extruder kit
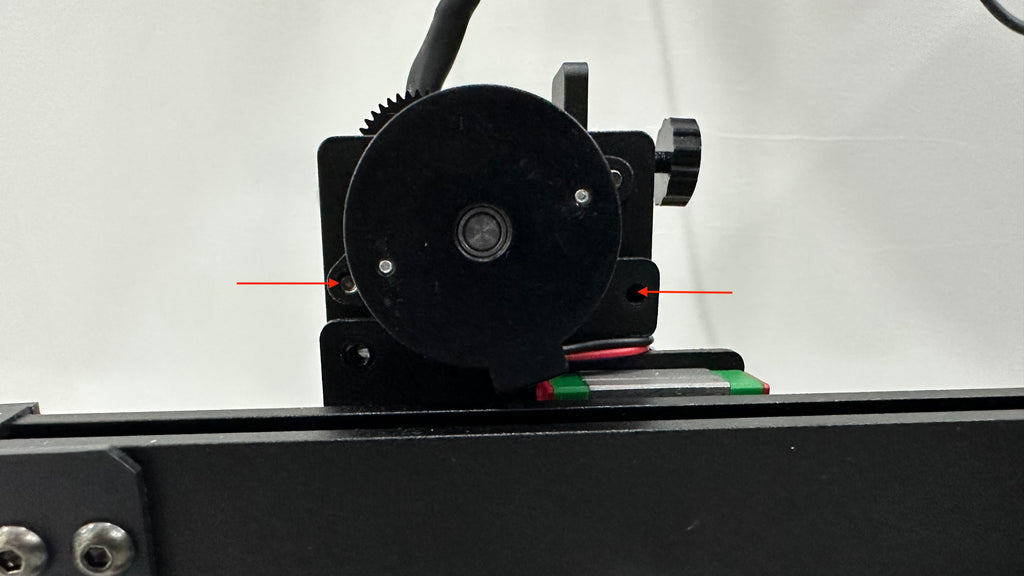
Remove the marked two screws. Then you can take the extruder kit down. You can take a photo to the THR cable direction, if you are afraid of the wrong connection cause the mainboard burned.
Those two screws are the only thing you need to remove to replace an extruder kit for your KP3S Pro V2.
Step 3, Disassemble the extruder kit
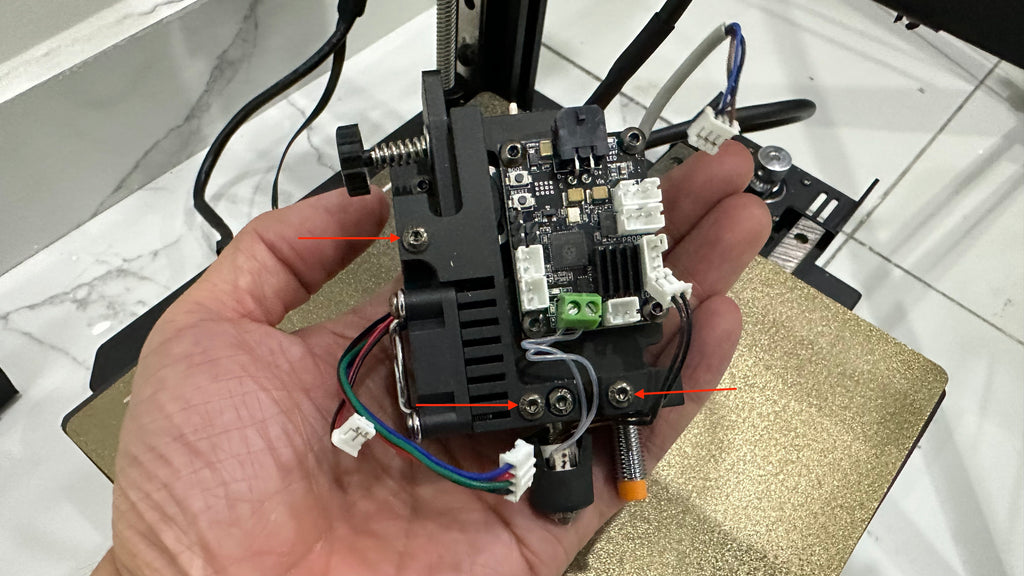
Remove the marked 3 screws to prepare its disassembling, disconnect all the cables. You can also take a photo to it if you are afraid of having problems to connect them back. That’s all you need to do, just keep the THR board and hotend kit remain default.
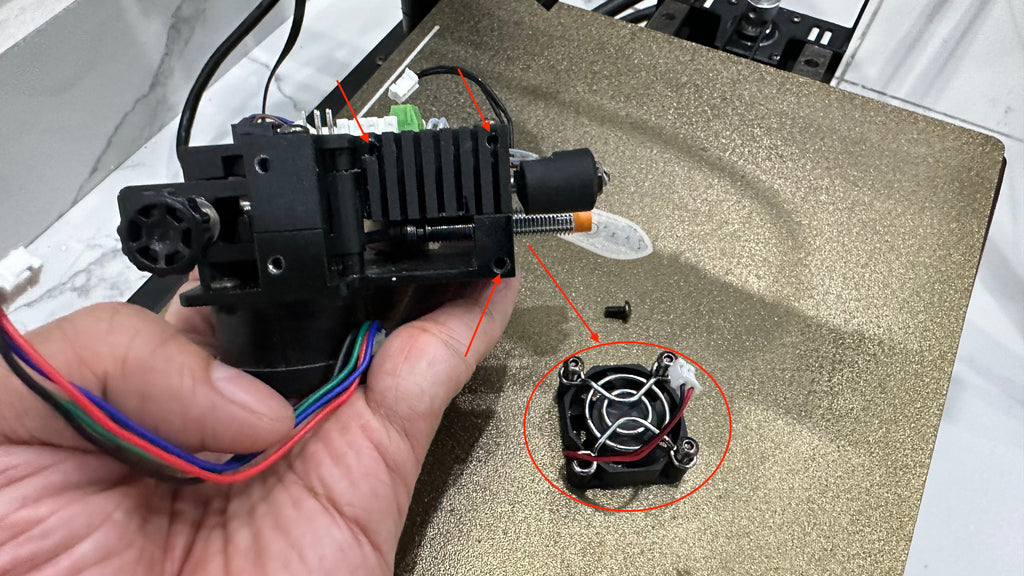
Then remove the marked 3 screws and remove the 3010 fan. After that you can take the extruder apart. Take it easy and slowly, nothing will fall out and mess up.
Step 4, fix the extruder
All right, that’s it. So, we use an 9.5:1 extruder kit on the KINGROON KP3S Pro V2 screen version, it is a dual gear extruder kit wish powerful extrusion. The structure is quite simple, everyone should be able to manage its assembling and disassembling.
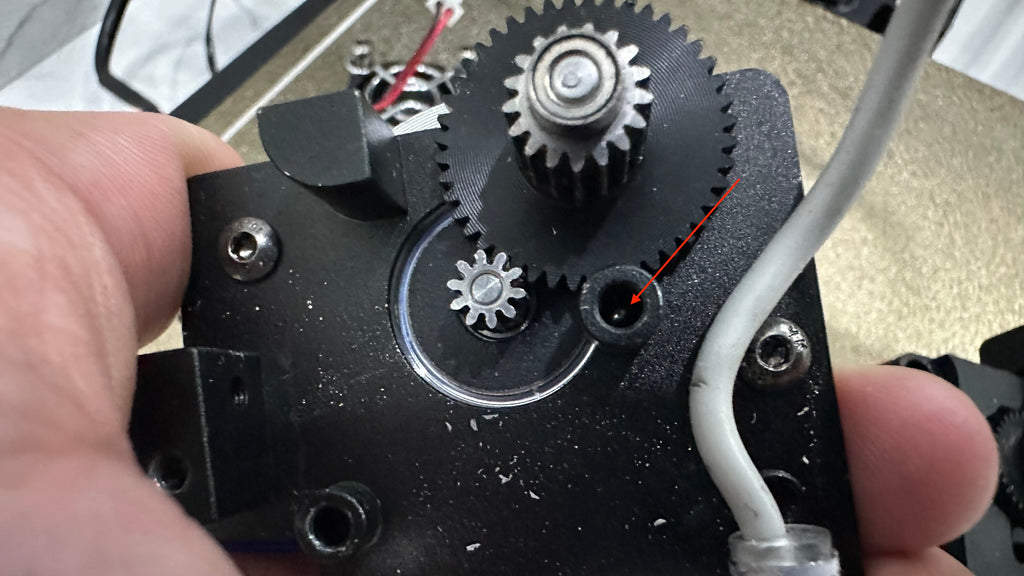
Then we come to the left part of the extruder. The marked area, the hole for the gear axis, there’s already a small bearing in it. That is all you need to do to fix it. Just cut about 1-2 mm filament and put it into this hole then you are all set. We got this bearing from the liner guide slider, which is a thing you never done, unless you happen to have ones. Filament, bearing, or even a little piece of paper, just put anything into this hole to make the axis up for 1-2 mms.
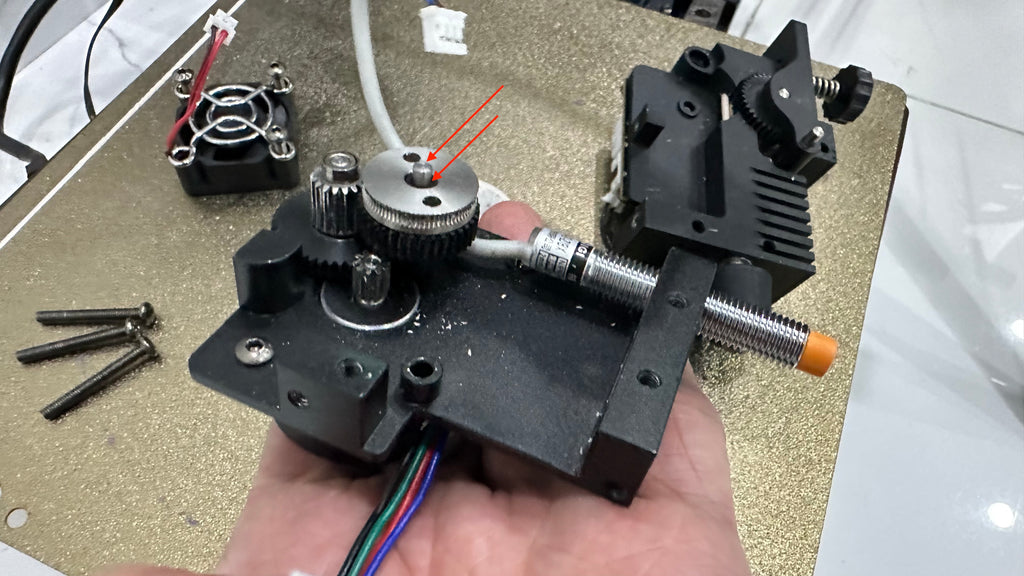
After that, you can put the gear with the axis in. The axis should be extended out for about 1-2mms. That should be for the correct extrusion.
This issue is caused by its tolerance, the too deep hole leaves a room for that gear to move up and down and cause the filament slippery, jam or even getting out from its path.
We noticed this issue and figure out the solution recently. And the tolerance has been reduced to avoid the same issue in all the newly build KP3S Pro V2.
After that, you can put everything back and start the print again. There is no need to do bed leveling or input shaper setting as long as you didn’t change anything on the hotend kit and leveling sensor.
Just be careful with the THR cable connection.
I just bought this printer, first benchy was ok.
Now I’m trying to print but a cracking sound came when the filament tries to enter the machine.
When I feed it at a slow speed everything looks good, when I feed it at a fast speed the sound comes and the filament gets stuck and extrudes badly.
As the printer is very fast to print, this issue presents itself a lot while printing, kindly offer some assistance.
Sorry, es ist ein kleiner Rechtschreibfehler passiert. Das filament will trotz Fix nicht “rein”!
translate:
Sorry, there was a small spelling mistake. The filament doesn’t want to “go in” despite the fix!
Das filament will trotz Fix nicht ein! Der Kp3S V2 Pro ist leider weiterhin ein Reinfall. Schade. Ich werde es bald entsorgen müssen. Die Spielerei geht mir so auf den Keks. Sorry.
Translate:
The filament doesn’t work despite the fix! Unfortunately, the Kp3S V2 Pro continues to be a failure. A pity. I’ll have to throw it away soon. The gimmick really annoys me. Sorry.
The layer fan has no regulation, it only works at 100% or 0%.
Now I have filament leakage from the hotend. Please I need a solution.
Acabo de Hacer todo el Procedimiento, y si se le coloca algo en donde indica, no cierra el extrusor. creo hay un error en este procedimiento.