OrcaSlicer is one of the most popular slicer for 3D printing after Ultimaker Cura, Simplify3D, and PrusaSlicer. And it helps to release the power of your KP3S Pro V2 and KLP1, our engineers have got way much better printing results with it.
If you are using the screen version of KP3S Pro V2, KLP1 3D printers, or you have upgraded the screen less version with the latest hotend kit, OrcaSlicer is a powerful tool you won’t want to miss.
Prepare:
If you haven’t got the OrcaSlicer, you can download it from here:
OrcaSlicer Download: https://github.com/SoftFever/OrcaSlicer/releases/
After installing the software, you can download the profiles as below:
KLP1 OrcaSlicer Profile :
https://1drv.ms/f/s!AmGcVrncIH3Zk2otPcnHZrOZPGA5?e=eH3KUu
KP3S Pro V2 Orca Slicer Profile:
https://1drv.ms/f/s!AmGcVrncIH3Zk2lBqc72A8oVQf-U?e=ZEUpYw
It will be updated soon and we will keep updating it.
Import:
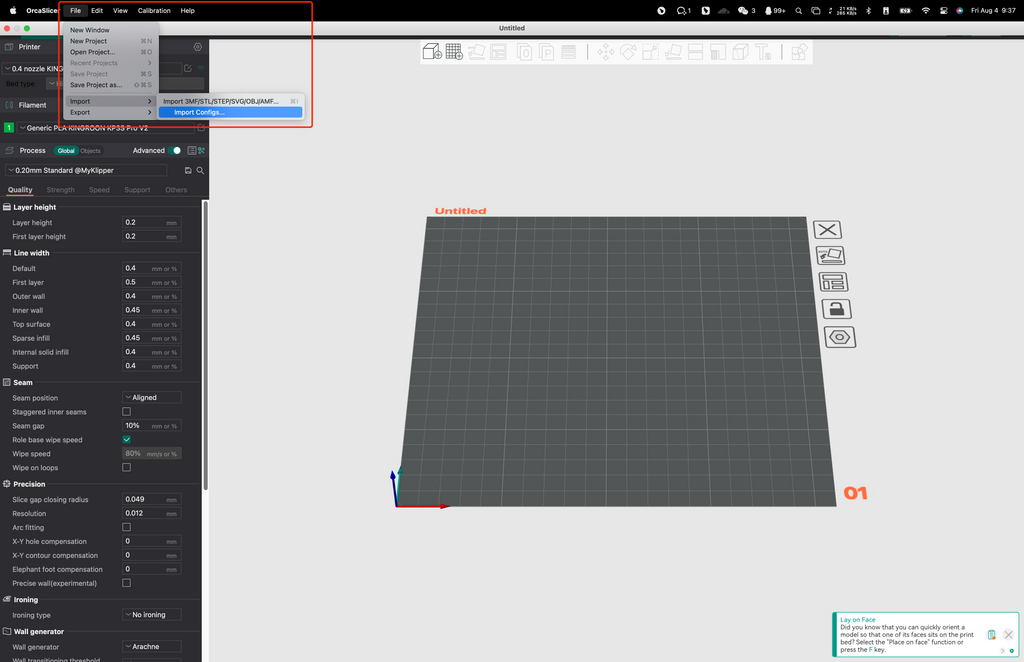
Once you finished the OrcaSlicer installing, skip the setup wizard, click file/import/import configs.

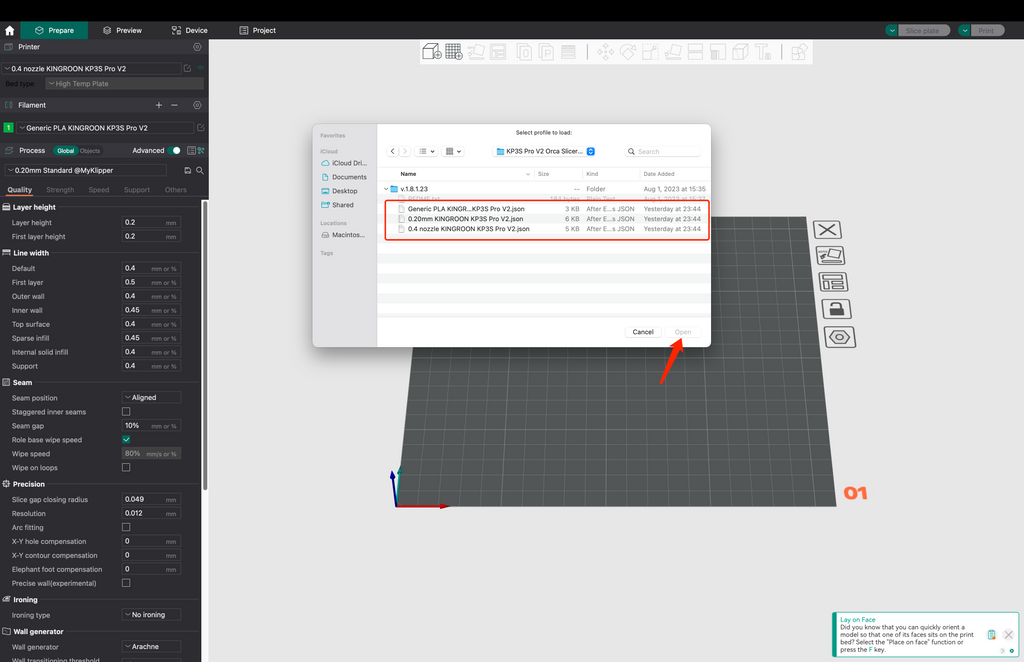
Then choose the profiles you just downloaded.

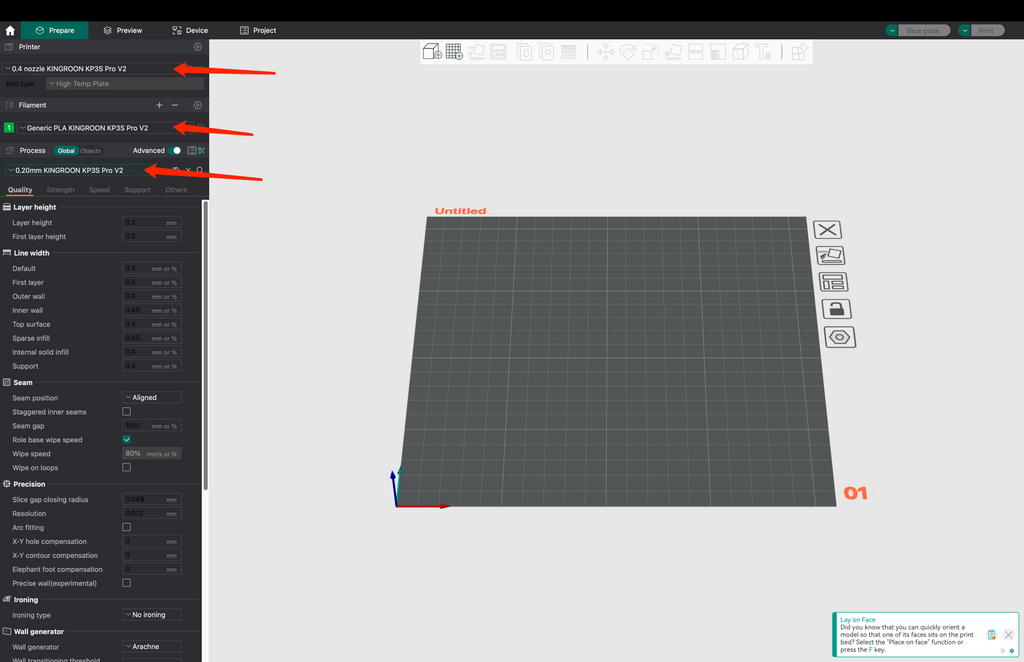
Select the profiles in “Printer”, “Filament” and “Process” field to activate the presets.

After that, you are all set, just put the files in and slice it directly.
Slicing:

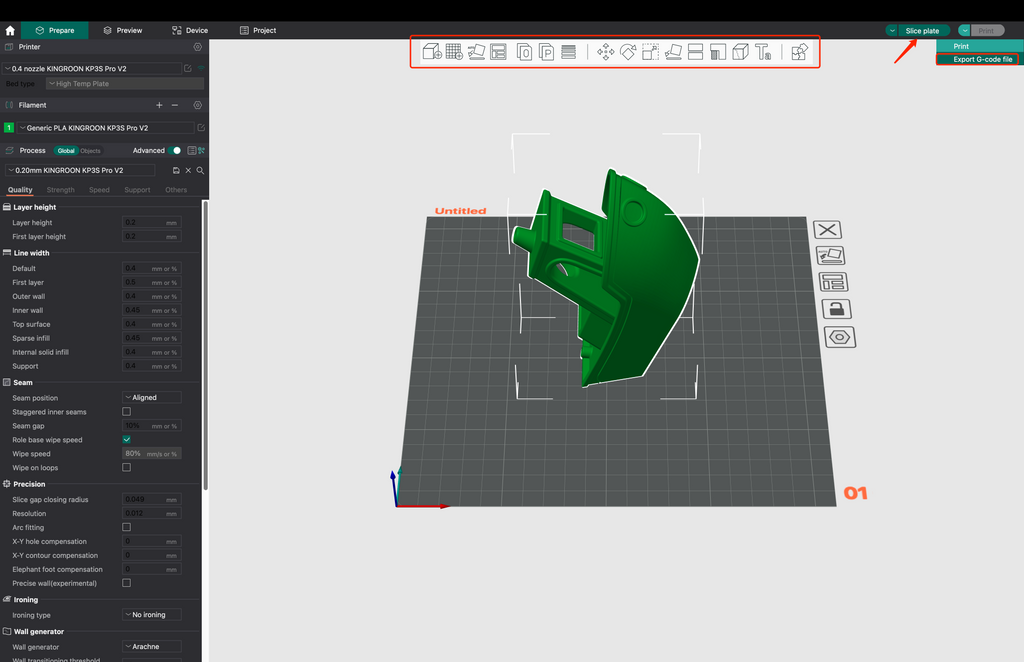
So the left fields are for printing settings, you can switch from “Quality” to “Others” to define your settings on different features and functions.
The marked icons on the top middle are for processing the 3D models. If you switch from the Ultimaker Cura, this filed is alike the left side filed.
If you are new in 3D printing, 3d models marked as “support free” are what you should looking for. You can download and slice them directly with the current settings for most of the time.
Once you finish the slicing, click on “Slice plate” and switch to “Export G-code file” to save the files.


the profile could not be downloaded