It has been one year since we released the KINGROON KP3S Pro V2 on April 7, 2023. Let’s talk about the changes we made based on the real-life feedback in this year.
April 2023
The original KP3S Pro V2 was released on April 7, 2023, with the brand new Klipper mainboard installed and a new designed 5:1 extruder kit.
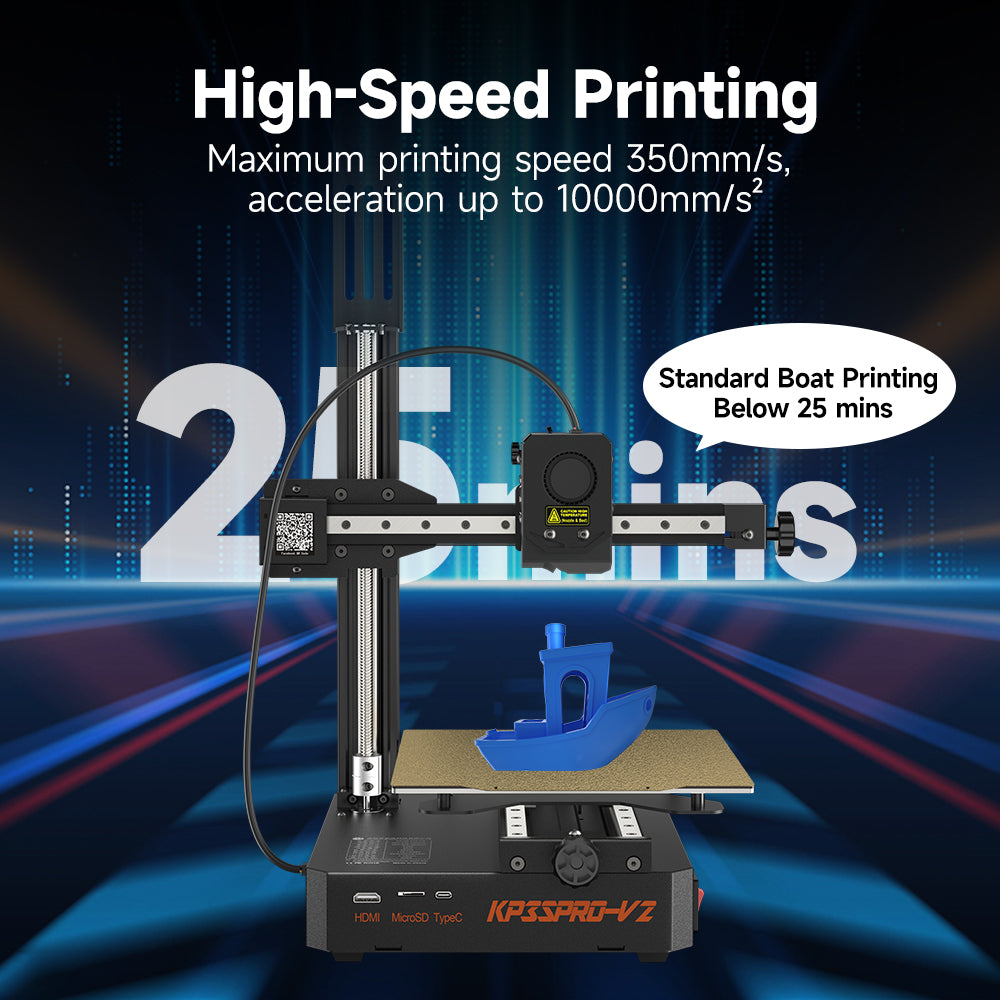
With the customized Klipper system, advanced THR board, powerful Klipper Mainboard(KINGROON KP Cheetah v1.0 Mainboard), and internet connection, so people can control the printer with any screen, in anytime and at anywhere.
Specification to mentioned:
1.Screen less
So, the original version of KP3S Pro V2 is screen less, it is totally controlled by internet with your smartphone or other devices with a screen and internet. As it you may know from the later article, the KINGROON KP Cheetah v1.0 Mainboard doesn’t have a screen port that time.
But people are able to use an HDMI screen to enjoy the full Klipper Screen feature with the HDMI port.
2. 5:1 gear ratio extruder
So, the original extruder kit is a 5:1 gear ratio, using an 8500-ring cooling fan, V5 heatblock and KP3S heatbreak, and already has the THR board inside.

It is not hard to tell that the original KP3S Pro V2 doesn’t use all metal hotend, the support to high temperature material like ABS are not so good, the top temperature os
3. Internet connection
The KINGROON KP Cheetah v1.0 Mainboard does support the ether net connection and external USB wireless adapter. So, there are two ways to connect the original KP3S Pro V2 to the internet, by ether net or wireless adapter. Check Internet Connection and Wi-Fi Configuration on the KP3S Pro V2 and KLP1 3D Printers to know more details about it.

June 2023
Like we mentioned in “That’s how we make every KINGROON 3D Printer” the original KP3S Pro V2 was under the same process before they were shipping to our oversea warehouse by sea. After the releasing of the KP3S Pro V2, we start to receive real-life feedbacks and do the necessary improvement right after that. One of the most critical issues is the deformed heatbed bracket. Some customers claimed to us that they received a KP3S Pro V2 with a deformed heatbed bracket, which makes the printer cannot be leveled properly. We look into these cases then find the local shipping should be the cause, as the same issue has never been found during its developing, producing and testing.
1. The New heatbed Bracket
The engineers of KINGROON takes it seriously, they give an improved version based on testing so quick.
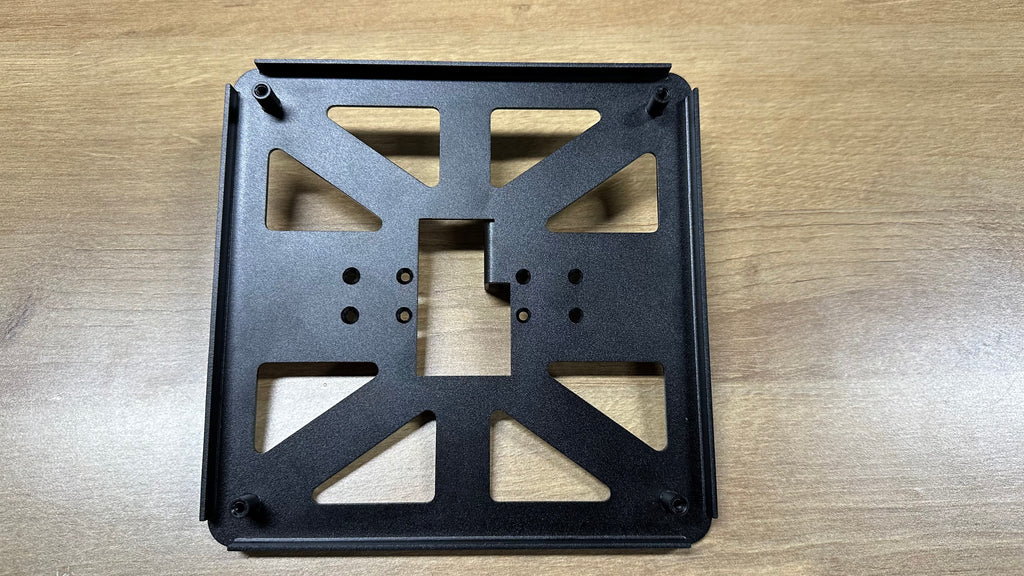
The new bracket is square one, it makes the force more even, and also is a stronger structure. Once we found it works, we produce them volume, send them as replacements to those who has the issue on the printer, and make the new bracket as default setup on the newer version.
There are also several other upgrade we made on the newer version.
2. The 12864 screens
The screen version of KP3S Pro V2 becomes available in June 2023. Thanks to the port on the
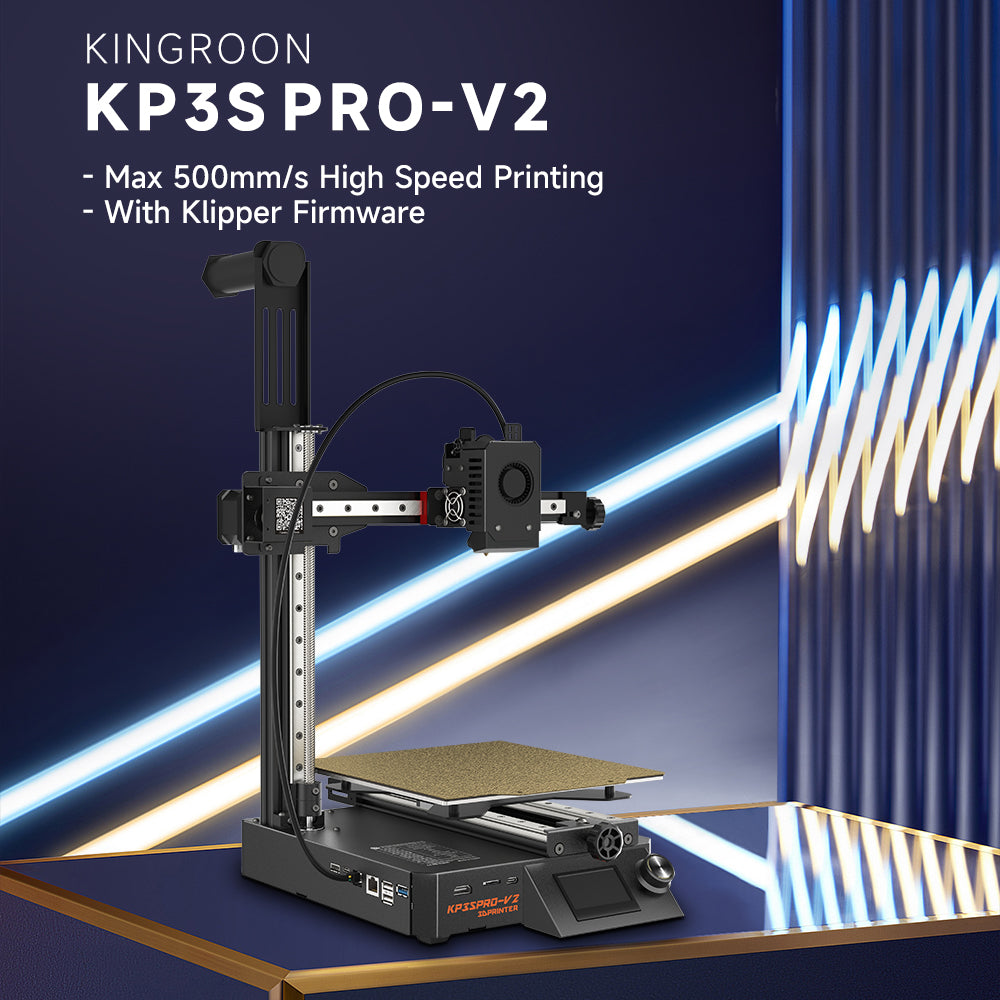
KINGROON KP Cheetah v2.0 Mainboard, the newer V2 has a screen by default. The printer can be controlled more conveniently by turning and pressing the knob. We also released the tutorial to show people how to do the initial set up for KP3S Pro V2 with the screen.
3. The 9.5:1 gear ratio Extruder Kit with all metal hotend
All metal hot end is one thing we have been heard for a long time, people have the needs of printing ABS. We did make it happen and provide the upgrade kit for our old models like KP3S and KP5L. So, after the release of the KP3S Pro V2, we start to think about use it, too.
Then we add CHC heating core and all metal hotend, which make it have capability of printing ABS. The nozzle temperature can go up to 300, plus the all metal hotend, ABS printing is time. The extruder kit was also upgraded to 9.5:1 gear ratio, it is certainly better for high speed printing. The part fan upgraded to a 9500-ring bearing fan to provide better cooling.

4.The Build-in WIFI Module
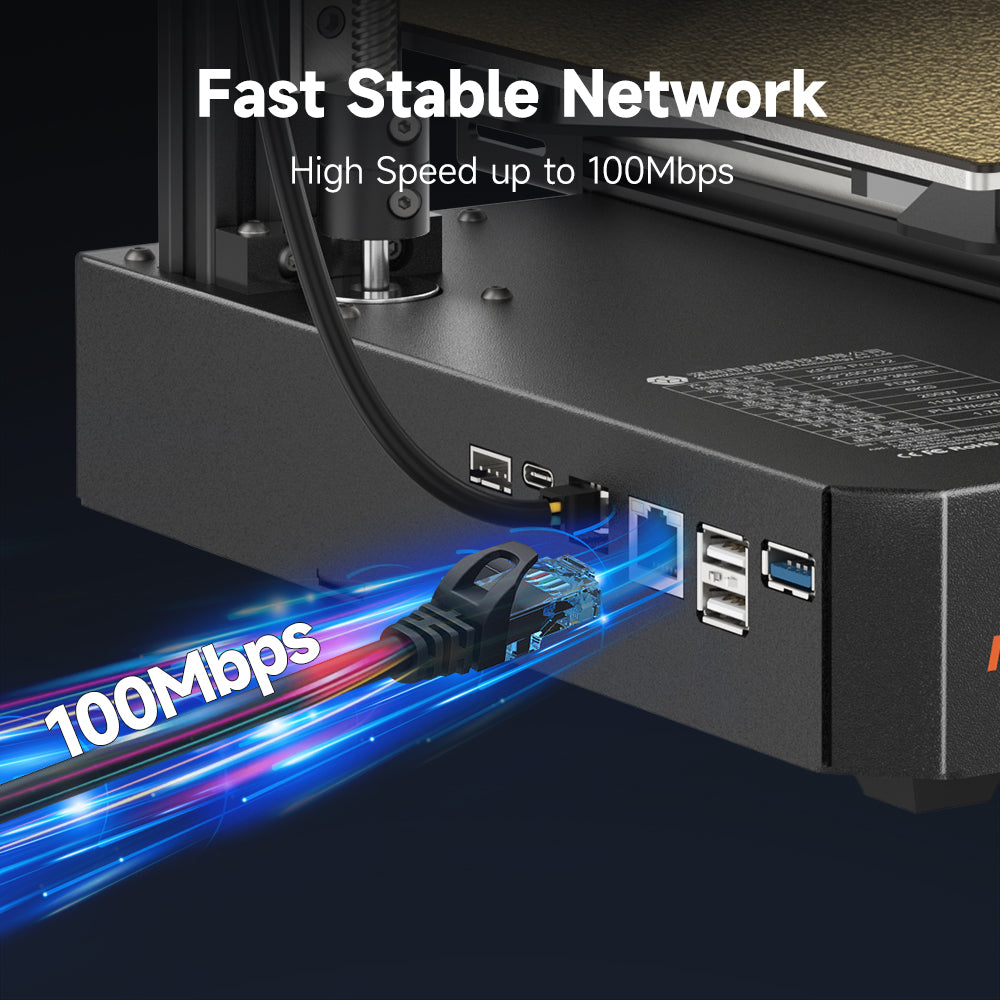
The mainboard upgrade brings the WIFI support for KP3S Pro V2 with a build-in WIFI module. People can connect the printer to internet with both ways, WIFI and ether net cable. But we do suggest using ether net to have a more stable connection, especially when you have a weak router, or have to many devices within the same connection.
August 2023
Both KP3S Pro V2 and KLP1 keep updating, after hearing the voices from the customers. For example, we keep updating the system images regularly, we keep updating tutorials to help people use them better, and we keep updating the presets to support more materials and slicers.
One thing special in August 2023 is we start to change to use speed-adjustable-fan as default. So, we did send a lot of replacements fans for those who wants to adjust the fan speed for more material printing. We see the needs and the improvements on printing with the new fan, so we thought it is better to make it default.
October 2023
There are two major change that we made on the KP3S Pro V2. We start to use KLP1 hotend on KP3S Pro V2 and we upgrade the Klipper unit setups.
1.The KLP1 Hotend on KP3S Pro V2
People might have noticed the difference between the hotends of KP3S Pro V2 and KLP1. The KLP1 has a slimmer heatbreak, which makes its better for extrusion. So, we decide to use KLP1 hotend on KP3S Pro V2 as well.
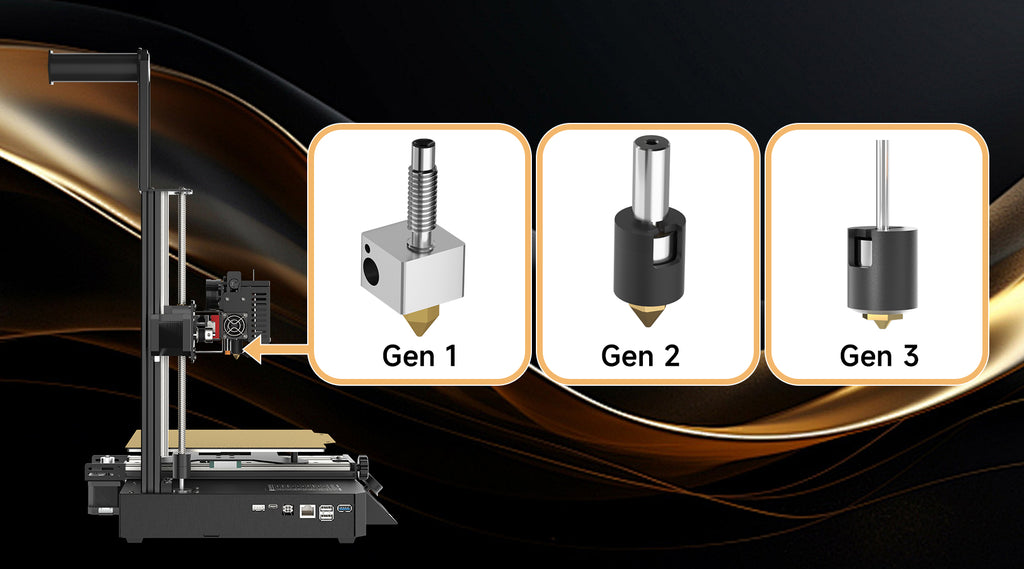
2. The Klipper Unit Setups
It is also the time the KINGROON KP Cheetah Mainboard comes to its 2.2 version, with upgraded WIFI module, enhanced CAN BUS connection and removed build-in battery.
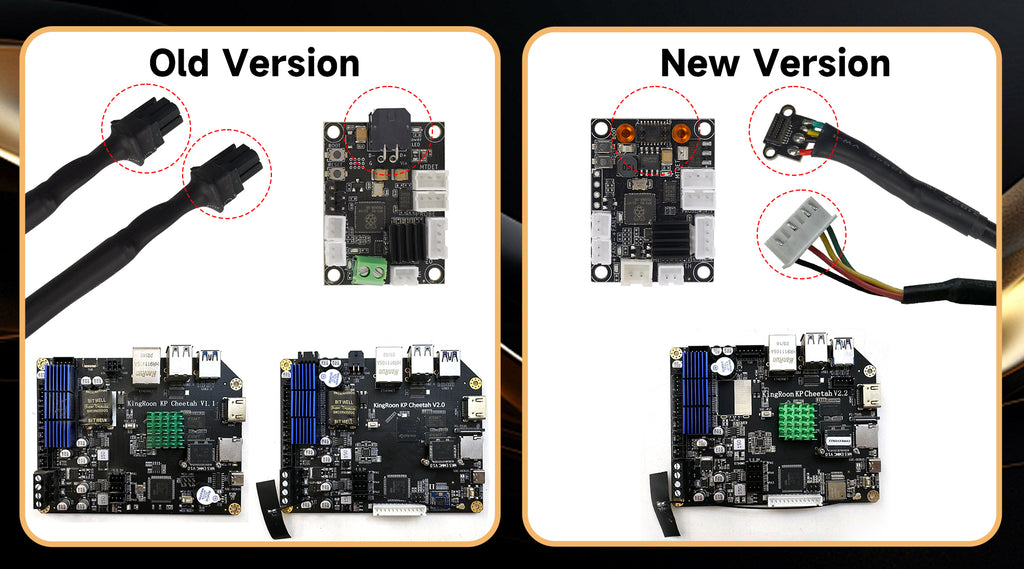
In this version, we change the THR cable connection and we reinforced the connector with Glue and screws. Due to the high-speed printing of Klipper, the old version of KP3S Pro V2 requires the THR Cable to be fixed. Otherwise the THR board might be disconnected from the host computer and causing errors. So we start to use a new connector on the THR board and use two screws to reinforce the connection.
As we mentioned in Klipper Mainboard - KINGROON KP Cheetah Mainboard , we removed the build-in battery that was there on the previous versions, the v2.2 mainboard is also more stable now.
And of course, we bring the whole setup to the KP3S Pro V2 and KLP1, these changes are default now.


Greetings Kingroon,
This has become one of my favorite printers, more than the Creality K1 & the Voron models I have built! I just love the size(beautifully compact cantilever design), and this is a mighty match for the Bambu A1 Mini for those who know how to tinker with a printer, and with open source freedom to match. This is not a printer for a first time 3d printer enthusiast(and you should warn them this is for advanced users), but one that has at least 1 year experience as some of the features requires a bit of knowledge. I have to say that your engineers and constant evolution have made a very competitive product, and you should be proud to deliver such a quality product at this price point, to build an equivalent system would be more than the cost you are selling it.
What I respect the most is your team invested funds in the performance of the product, and left some room with the community to evolve examples: Canbus capable Mainboard w/ WiFi with Klipper, linear rails on all axis, ceramic hot end, ADXL, Canbus wiring, front display, and extruder improvements. Based on what is available in the community, and my own slicer evolutions, I have so far made few minor tweaks and it prints are near Bambu level prints. It has excellent first layer adhesion, and very little ringing artifacts. (Feel free to reach out if you want a decent PETG, and PLA profile for Orca slicer for good quality very fast prints, i think i found the right balance if you want to test and include for future customers). I think you really have one of the best small form factor printers on the market and appreciate the constant improvement by your team! These things are amazing as they take very little space and give you most of big boy 3d printer experience.
-————————————————————-
Here are some considerations for your future revisions:
Here’s some things I love- Pressure advance test for PLA included! this is fantastic for first time users – please consider including a pressure advance file for PETG, TPU, and ABS on the USB. The pressure advance file is essential for customer satisfaction in first prints.
Love the first time level & Input shaper test right on the display, and rotary encoder. Very easy to get amazing prints after those basic tests. Consider making a klipper script that combines a first time user, self test of printer and allows both features to combine, i believe creality does this with the K.1
Works amazing with any USB camera in klipper web interface with no additional work required. Please allow way to update klipper and fluidd as it seems not to be set up for updates. Please include a way to see bed level mesh, which is currently missing after running auto bed leveling, the bed mesh page is blank… and other customers seem to report this with a the latest 2024 printers.
Very easy print head to dissemble, your team did an amazing job making a very compact print head… Consider allowing customers cad or STL drawings of the cover, so it can be modified, maybe even allow customers to make voron KP3Spro hot end face-plates with onboard lighting… Maybe allow customers to add their own LED lights to tool head, this may require can-bus mod.
Filament holder is a great location, consider making the spool modification or providing a larger adapter STL to remove resonance of shaking printer filaments during input shaping and prints.
The 9:1 extruder is very capable and compact, but tends to shave filament and route filament often directly into hot end fan during filament change outs. Please consider a way to access extruder without taking part of rails. Improve filament path to prevent filament from being shaved by sharp edge filament guides. This could be a problem for those with limited printer experience.
The Hot end fan is leads to poor print quality in rear of printer, so it is better to replace with somethign with more side airflow, there are several online fan duct replacements, and they work excellent in improving print quality.
Consider including STL and presliced files in the provided USB drive of your favorite printed mods for the printer such as wire guards, fan ducts, camera holder, trim or faceplate accessories.
The front screen display is functional and excellent in it’s utilization, but is not very pretty, please give us STL and cad drawings so customers can improve and beautify it. Next revision should make front display holder a little more decorative.
Allow customers or sell upgrade paths like they due with sports cars – stage 1, stage 2 – For example stage 1 could include hardened nozzles, filament sensor and a camera. Stage 2 could include led light kits for print head, and a new LCD klipper screen with faceplate. Stage 3 could include an eddy probe?
Ask customers to provide you the best printer profiles so you can provide both cura and orcaslicer profiles with the printer USB. the Cura files are OK, but my orca slicer is much better. You should share these on your website, and include latest on the USB.
Ever think about showing a tutorial for Octoeverywhere, or something equivalent… good stuff to include for those that want web access.
Feel free to reach out and would love to review or provide feedback on your future improvements. Thank you for your time!
J.