Packaging List of Kingroon KP5L 3D Printer

Assembly Instruction of Kingroon KP5L DIY Version
Step 1. Fix the two Z-axis on the bottom panel with M5*20 screws, as show below.

Step 2. Take the top aluminum part and the filamnet rack out. Use M5*12 screws to fix them on the Z-axis guide rail.

Step 3. Take out the heatbed of your Kingroon KP5L, and the leveling nuts and springs. Assemble them together and install the heatbed on the Y-axis of Kingroon KP5L 3D printer.

Step 4. Fix X-axis with 4 M5*12 screws on the Z-axis as shown in the picture.

Step 5. Take out the the heatbed and Y-axis that already assembled in Step 3, and fixed it on the acrylic board with 5 M5*12 screws as shown below.


Step 7. Take out the power supply and fix it on the right Z-axis guide rail with M4*6 screws.
Step 8. Fix the LCD display with 2 M4*12 screws.

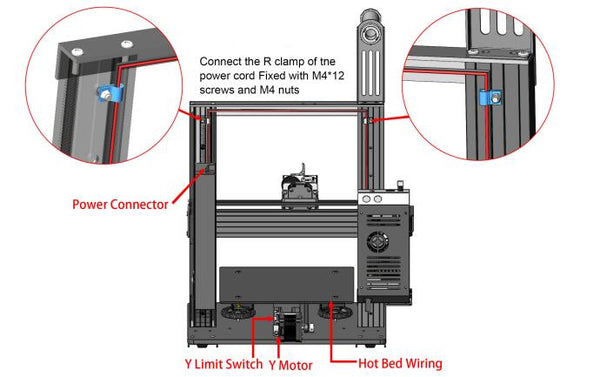
Wiring Instruction of Kingroon KP5 3D Printers


Please send it start/end code KP5L.