KINGROON KP3S Pro V2 and KLP1 3D Printer Cura Profile Setting
In this article, we will show you how to import Cura profile for your KINGROON KP3S Pro V2 or KLP1 3D printers. To make sure everyone can start with Klipper firmware easily, our engineers are dedicated to preparing everything that may help people. The cura profiles we use are specifically optimized for high-speed printing under the Klipper firmware.

Since the profiles hasn’t been submitted to Cura yet, you need to import them manually. You can find them in the USB drive. Move those files to the Cura folders, you can add the printer from the list.

Windows Users
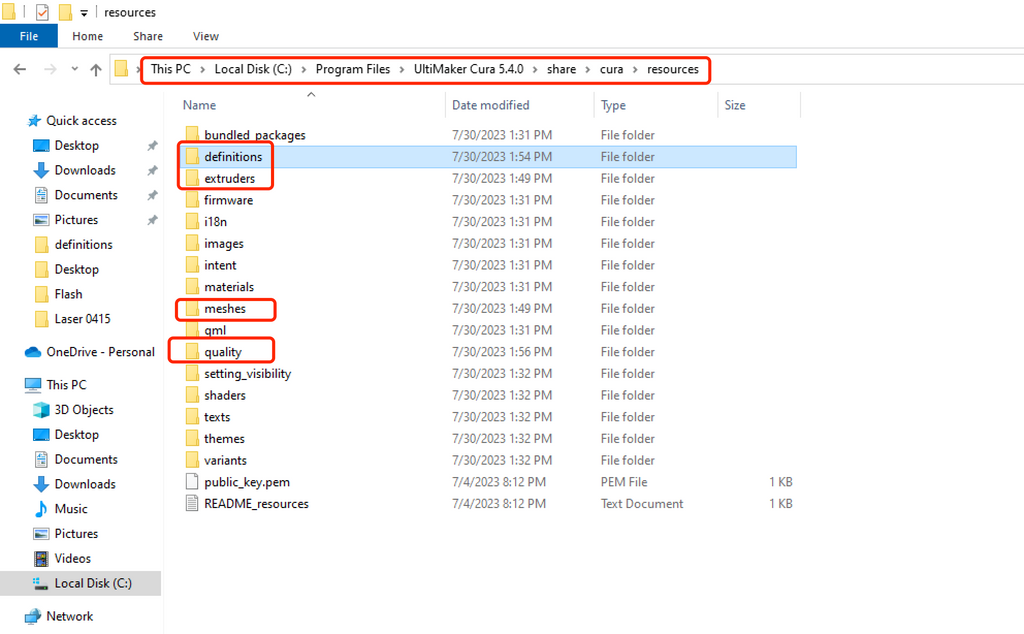
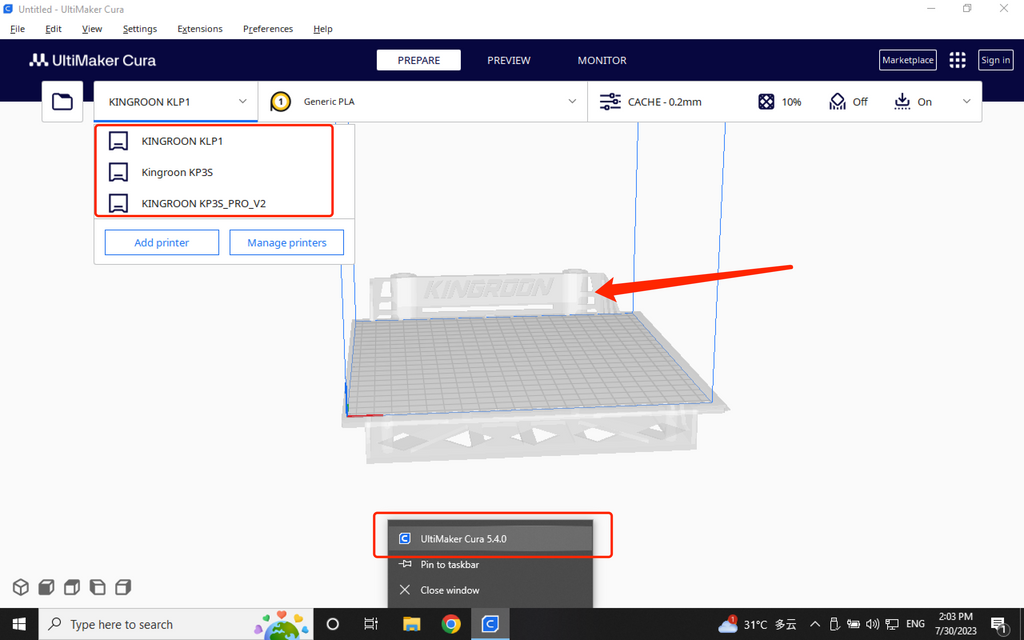
For Windows users, you can open the “readme.txt” file and follow its steps directly. If you don’t know where the folder is, you right click on the Cura icon, then select “Open file location”. Please make sure to use the version newer than 5.3.0.

Here is the location you can find the folder:

Just put the files in as below.
KP3S Pro V2:
1.Put the "KINGROON_KP3S_PRO_V2" folder in the "share\cura\resources\quality" directory under the Cura 5.0 installation path.
1.Place the "KINGROON_KP3S_PRO_V2.def.json" file in the "share\cura\resources\definitions" directory in the installation path.
3.Put the "KINGROON_KP3S_PRO_V2_extruder_0.def.json" file in the "share\cura\resources\extruders" directory in the installation path.
4.Put the "KINGROON_KP3S_PRO_V2.STL" file in the "share\cura\resources\mesh" directory under the installation path.
5.Close all open Cura software and reopen it, then add KP3S_PRO_V2.
KLP1:
1.Place the "KIINGROON_KLP1" folder in the "share\cura\resources\quality" directory under the cura5.3 installation path.
2.Place the "KIINGROON_KLP1. def. json" file in the "share\cura\resources\definitions" directory in the installation path.
3.Place the "KIINGROON_KLP1_extruder_0. def. json" file in the "share\cura\resources\extruders" directory in the installation path.
4.Place the "KIINGROON_KLP1. stl" file in the "share\cura\resources\meshes" directory of the installation path.
5.Close all open CURA software and add KLP1 after reopening.
Once you finished, you can see the new model from the list.

If you are had the "Open GL 2.0" error, please check the following link and update your drivers:
https://www.3dprintgorilla.com/cura-failed-to-probe-opengl/
Mac Users
It is a little bit different for Mac users. Click right on the Cura icon, then select “Show Package Contents”.

Then below photo will show you how to find the correct folders. The Cura in Mac OS does have two same paths that may get people confused.

After that, open the Cura, follow the below selection: Settings>Printer>Add Printer…>Non UltiMaker printer>Add a non-neterworked printer>KINGROON. Then you will see the new models has been added successfully.

Comments
Leave a comment