Klipper is a next-generation firmware for 3D printers that offers faster, precise, and high-quality printing by offloading the intricate calculations from microcontrollers to more powerful systems, such as a Raspberry Pi or SBC. One of the features that makes Klipper stand out is the timelapse functionality, which allows you to record your entire 3D printing process and share bits of it on your social media platforms or analyze print failures and pinpoint the causes behind a failed print.
To use the timelapse feature in Klipper, you need to install Moonraker timelapse, which is a third-party component that can create timelapse videos of your 3D prints. Moonraker timelapse is compatible with Mainsail and Fluidd, which are two of the most prominent interfaces tailored for Klipper.
In a previous article, we have discussed the installation process for the Moonraker timelapse component. If you haven’t already, I recommend following those instructions first.
Now that you have already installed it, in this article, we’ll delve into the detailed configuration and options for the Moonraker timelapse component. In this article we will explore how to set it up using the Fluidd interface to achieve optimal results for your timelapses. We also have an article on all of the Timelapse settings in Mainsail if you are using the Mainsail interface.
Let’s get started!
Accessing timelapse settings in Fluidd interface
To access the timelapse settings in the Fluidd interface, follow these steps:
1. Open the Fluidd interface in your web browser.
2. Click on the Settings option in the left vertical menu.
3. From the settings menu, select Timelapse.
When you follow these steps, you’ll be taken directly to the timelapse options within the Fluidd interface. From there, you can fine-tune and optimize various settings related to your timelapse videos.
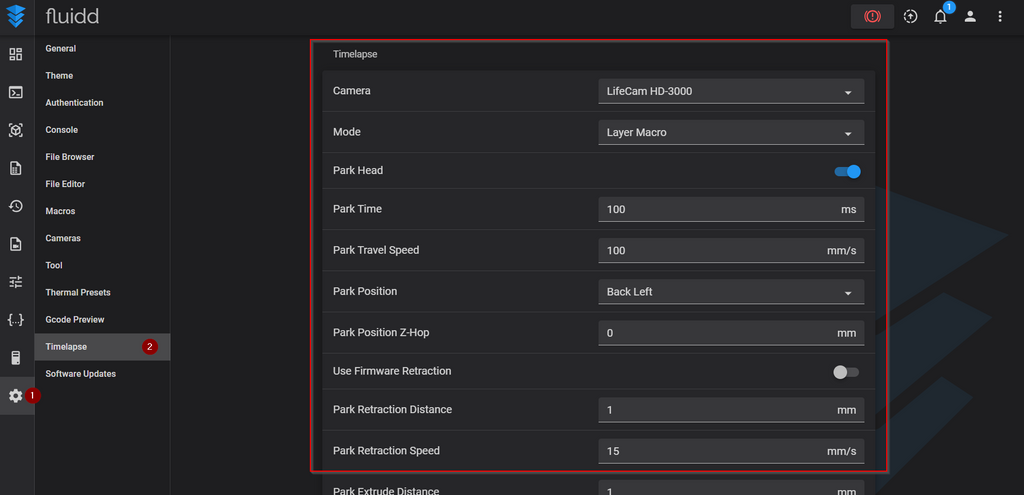
Let’s dive into the details of each option to understand their impact:
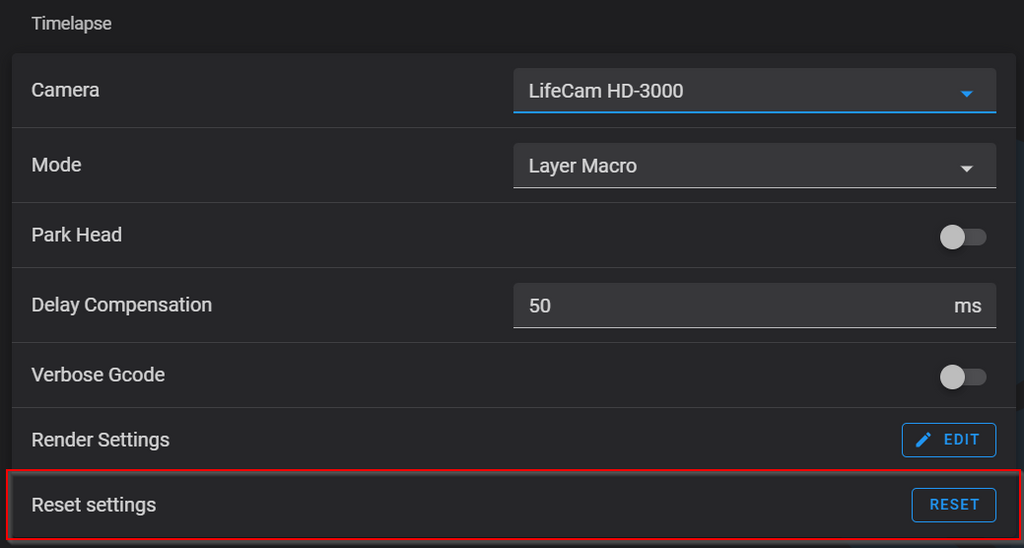
1. Camera:
This option lets you pick the camera that records your timelapse. If you have multiple cameras, you can use one for live streaming and the other high quality one for creating the timelapse videos.
2. Mode:
There are two modes available 'layermacro' and 'hyperlapse'
Layermacro:
This mode uses a macro to trigger frame grabbing, but needs the slicer to be setup to add such on layerchange.
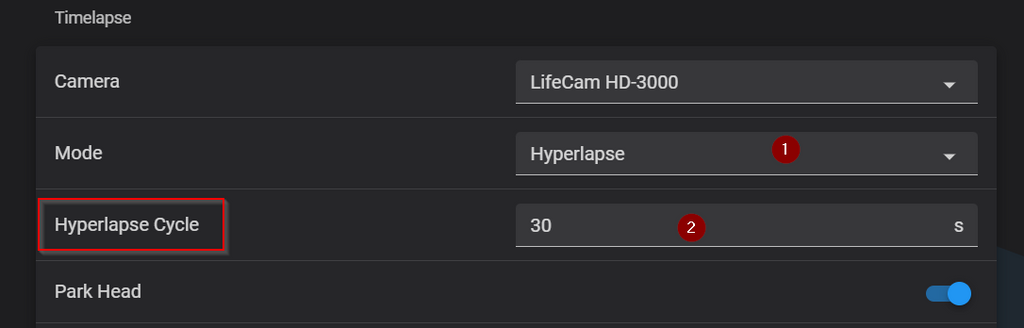
Hyperlapse Mode:
● In this mode, the camera captures a frame at regular intervals, as configured by the hyperlapse_cycle setting.
● When you enable hyperlapse mode, a new option called Hyperlapse Cycleappears with a default value of 30 seconds.
This means the camera will capture an image every constant 30 seconds to create the timelapse video.
3. Park Head:
● When set to ‘true’, it enables parking the printhead before capturing a frame.
● When set to ‘false’, it disables this feature, and the printhead will not be parked before taking a frame.
4. Park Time
This setting specifies the head park time in milliseconds (ms) for capturing the frame. Adjust this value as needed for your timelapse configuration.
5. Park Travel Speed:
This setting specifies the speed of the printhead movement while parking, measured in millimeters per second (mm/s).
6. Park position
The Park position setting determines where the printhead should be parked before capturing a frame for the timelapse. You have several options:
● Center: Park the printhead at the center position.
● Front Left: Park the printhead at the front left corner.
● Front Right: Park the printhead at the front right corner.
● Back Left: Park the printhead at the back left corner.
● Back Right: Park the printhead at the back right corner.
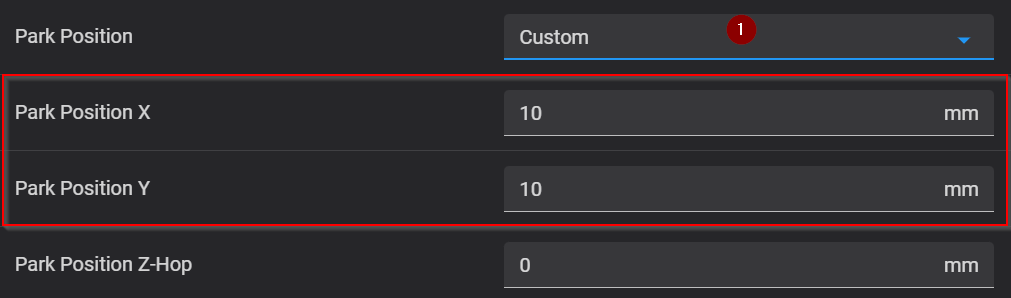
● Custom: Allows you to define a specific custom position for parking the printhead.
When you select the custom park position, two additional options become available:
1. Park Position X: Specify the X-coordinate (in millimeters) for the custom park position.
2. Park Position Y: Define the Y-coordinate (in millimeters) for the custom park position.
7. Park Position Z-Hop
This setting determines the Z-hop value (in millimeters) for the printhead before moving to the park position.
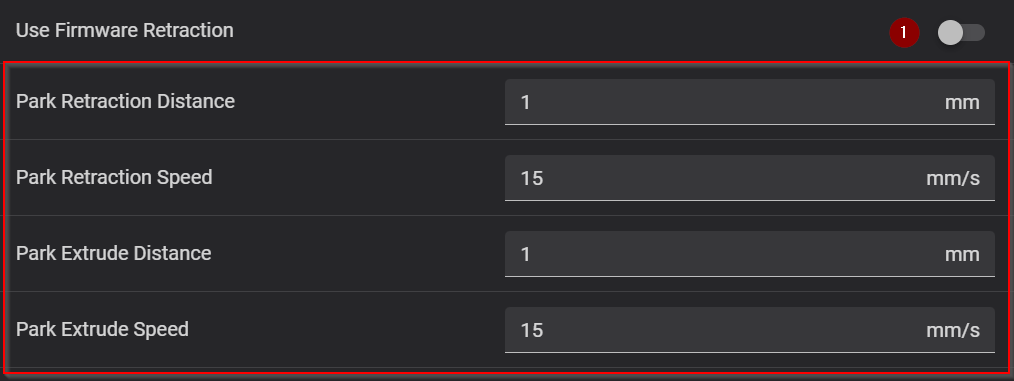
8. Use Firmware Retraction:
● When set to‘true’, it enables the use of firmware retraction in the macro.
● When set to‘false’, it disables firmware retraction.
● When you disable this option, you can control four options:
○ Park Retraction Distance: This value specifies the distance (in millimeters) for retraction when parking the printhead to prevent oozing. Adjust it based on your printer’s requirements.
○ Park Retraction Speed: Set the speed (in millimeters per second) at which the retraction occurs during parking. A higher speed may reduce the time taken for retraction.
○ Park Extrude Distance: This value determines distance to extrude to fill the nozzle before resuming the print (in millimeters) after the printhead is parked. Adjust it as needed for your setup.
○ Park Extrude Speed: Specify the speed (in millimeters per second) for extruding filament after parking to resume printing.
9. Delay
This setting accounts for any delays in the timelapse capture process in milliseconds (ms). Adjust it to ensure accurate timing between frames.
10. Verbose Gcode
● When set to‘true’, it enables verbosity for the macros. This means that additional information or details related to the macros will be displayed.
● When set to‘false’, it disables this verbosity, resulting in a more concise output for the macros.
11. Render settings
When you click on this option, a new window will appear with several render configuration choices. Let’s explore each of them in detail: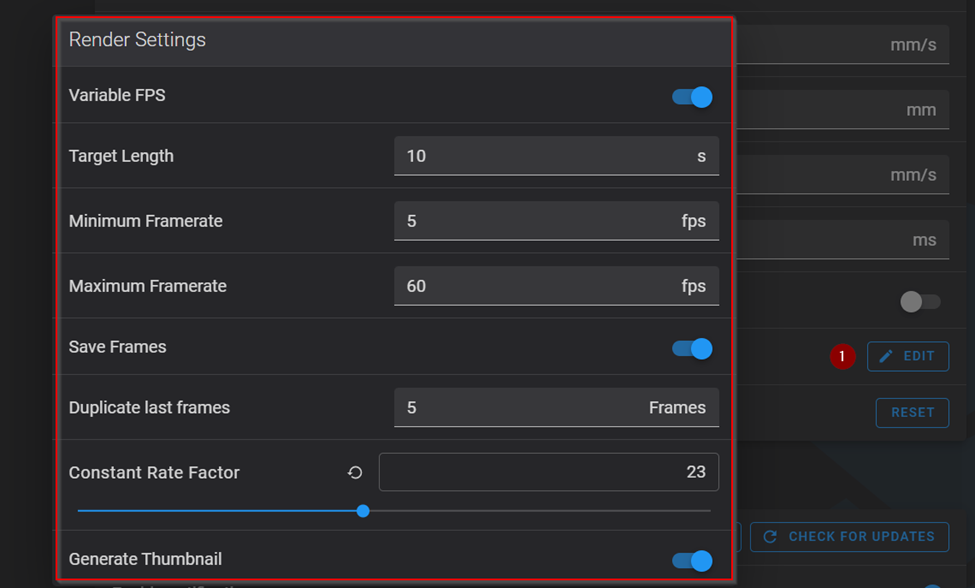
1. Variable FPS
When set to ‘true’, it enables variable calculation of the output framerate. This means that the frame rate adjusts dynamically based on the number of frames captured and the specified target length. The calculation considers the target length (duration of the timelapse in seconds) but is also bounded by the minimum frame rate and maximum frame rate settings. When set to ‘false’, the options for Target Length, Minimum Framerate, and Maximum Framerate will no longer be visible
2. Target Length
This setting defines the desired duration of the timelapse video, measured in seconds. Adjust it according to your preferences and the desired length of your final video.
This option is available only when you set Variable FPS option to true.
3. Minimum Framerate
This setting specifies the minimum frames per second (fps) for the variable FPS mode. Adjust it based on your desired timelapse quality and smoothness.
This option is available only when you set Variable FPS option to true.
4. Maximum Framerate
This setting specifies the maximum frames per second (fps) for the variable FPS mode. Adjust it based on your desired timelapse smoothness.
This option is available only when you set Variable FPS option to true.
Save frames
● When set to ‘True’, it enables packing the frames into a zip file for external use or rendering.
● When set to ‘False’, it disables this feature, and the frames will not be saved in a zip file.
6. Duplicate Last Frame:
When enabled, the last frame of the timelapse video will be duplicated and appended to the end of the output video. This can create a smoother transition between the last and first frames.
7. Constant Rate Factor (CRF):
The CRF setting allows you to balance video quality versus file size in the rendered video.
The CRF scale ranges from 0 to 51:
● 0: Represents lossless compression (highest quality but larger file size).
● 23: Default value, providing a good balance between quality and size.
● 51: Indicates the worst possible quality.
For optimal results, consider a subjectively sane range of 17–28. Values around 17 or 18 are often considered visually lossless.
Choose the CRF value that aligns with your desired trade-off between quality and file size for your timelapse video!
8. Generate Thumbnail
● Set true to automatically generate a thumbnail for your time-lapse video.
● Set false to not generate a thumbnail.
Now, we’ve come to the end of the time-lapse options in your Fluidd interface. There’s a more one single straightforward choice: the reset option. Selecting this will restore the time-lapse settings to their default values.
Access the timelapse videos in Fluidd interface
After successfully installing the Moonraker time-lapse component as outlined in the provided article and fine-tuning your optimal settings for time-lapse videos as we have explained, you can now access and download these videos after finished a printed part with timelapse option configured and enabled. Simply click on the time-lapse icon located in the left vertical menu within your Fluidd interface and you will find your videos.
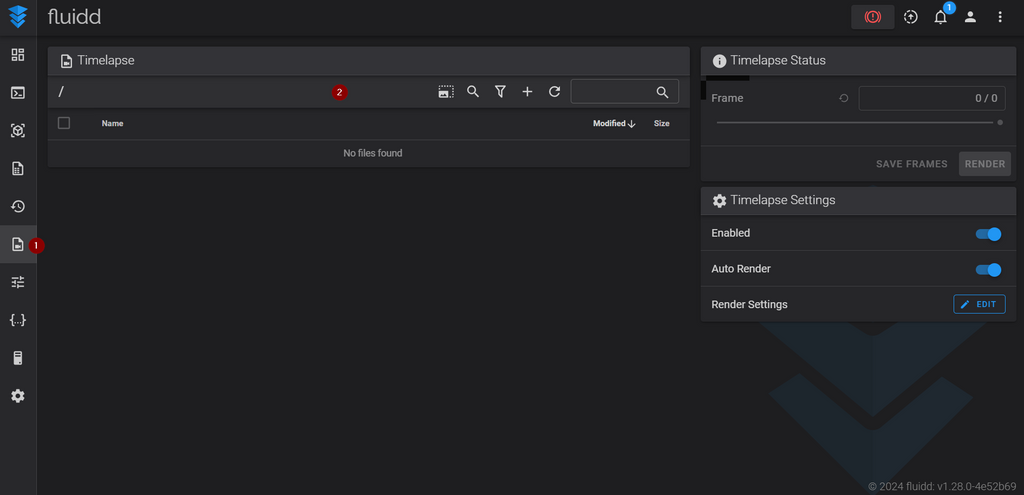
As you see you have also options to enable timelapse and auto render as well as the render settings in this page.
Congratulations! 🎉 You can now download your time-lapse videos and easily share them on your social media platforms.
Conclusion
Adding timelapse to Klipper with Fluidd enhances the 3D printing experience by allowing users to review and share their print processes, diagnose issues, and customize settings. This advancement demonstrates the growing intelligence and accessibility of 3D printing through community collaboration. Let us know if you try out creating timelapse videos with Klipper and share your creations with us! We’d love to see them!
Timelapse setting does not show and also when I go to update I get this
“Repo has untracked source files: [‘moonraker/components/timelapse.py’]”